Drawing with your children at an early age can have long term benefits. I am a HUGE proponent of drawing with your child, starting very young and continuing on until…maybe forever. Right off the bat, I can tell you that doing so will surely accomplish at least half, if not all, of the following.
The Benefits of Drawing With Your Children
At home, drawing with your children will:
- Build strong fine motor skills
- Produce quality time and memories with your child
- Create charming conversations that build vocabulary
- Relax you and your child
- Teach your child colors and shapes
- Prepare your child for “drawing” proper letter strokes that will lead them to comfortable and confident writing
- …which leads to reading
- Foster a child that likes to draw independently while you’re taking care of younger children, cooking, getting ready, etc.
Drawing Long Before Screen Time
Number 8 is paramount if you are homeschooling multiple children. Also, if you’re concerned with the growing amount of time that children spend on screens, teaching them how to draw can absolutely replace that.
My 4 children ages 8, 6, 4 and 2 don’t have an I-Pad. They keep busy doing so many other things, especially drawing and reading! Here’s a list of times and settings that my children often draw:
- Long waits in doctor’s offices
- Road trips
- In the morning before I wake up
- During quiet time
- At night when I’m putting younger children to bed
- When they finish school work
In School, Drawing With Your Young Students:
- Builds strong fine motor skills
- Produces quality time with you and your students
- Creates charming conversations that build vocabulary
- Relaxes the students
- Prepares students to “draw” letter strokes
- Gives an opportunity for students to “tell” their stories as they describe their drawing
“I just never stopped drawing.”
A 4th Grade teacher and former co-worker of mine was a phenomenal artist. When I complimented him one day on his art work, he humbly responded, “I just never stopped drawing. Kids draw when they’re little and then they stop and do other things.”
That rung with me for a long time because I am the epitome of a person who says, “Oh, I can’t draw. My brother took that talent. I can draw stick figures….”
Ironically, 2 years later, after my second child was born, I left teaching full time and became a drawing teacher. Gasp! A good friend of mine asked me if I would be interested in teaching after school art classes for her part time. I absolutely hesitated. Drawing was not my thing and the thought of teaching it made me feel very uneasy. Surprisingly, her response was simple and sure, “Don’t worry. I’ll teach you how to teach the kids to draw, step by step.”
Step by Step
My friend spent about 4 weeks teaching and training me. The real kicker is that her students draw with sharpie for each lesson that she teaches. Her “No Mistakes in Art” motto teaches the children to problem solve and turn unwanted lines into lines that they can use and like. Check out her students’ gallery here!
So much of how I teach writing to children developed from working for her and learning from her. Her gentle, step-by-step guided approach to teaching drawing is remarkable and transferable when teaching writing!
My 2 Year Old Son
During that first year of teaching art, I had two boys ages 2 and 1. My 2 year old son was expressing interest in using my pens. So, while I was practicing the drawing lesson for my students, I would sit next to him and show him how to “draw” simple lines and shapes. That school year, with no other purpose than to help my son, I developed and used the steps that I outline below.
Now, 6+ years later and looking back, I see clearly that teaching my young child how to draw simple pictures, turned into teaching him how to “draw” capital letters and later write words, sentences and stories. I have since used this approach with all 4 of my children and the youngest students that I work with each year.
To learn more about teaching writing, read my post titled, “Help Children Learn to Write: 10 Strategic Steps.”
“I’m not good at drawing.”
So, you might be thinking, “How do I begin drawing with my young children because I don’t draw?!”
Think of it this way. Your little ones don’t know that you can’t draw. Babies are born to love their mamas, papas and teachers! They just want to be with you and do what you do.
Moreover, whatever you teach them is fun, they will find fun. If you’re hammering nails, they want to hammer nails. When you’re cooking, they want to help. Whatever you’re doing, they want to do.
So, let’s capitalize on this interest. This is all to our advantage if we start early and participate ourselves!
As soon as your children show interest in writing utensils of any kind, that’s a good time to start. Then, follow the steps below and begin drawing with your child.
Markers vs. Crayons
I prefer to introduce children to markers before crayons. (Read why in my Markers vs. Crayons post). They are bold in color, wide for a toddler-hand grip and are easy to wipe up when we get off the paper.
Steps to Drawing With Your Children!
At last, here is a progression of steps I use to teach toddlers and young children how to draw. These steps will prepare young children to comfortably and confidently write later on. Truthfully, strong writing leads to strong reading.
You can begin these steps as early as 18 months depending on the child’s interest. I suggest ages simply to make you aware of how early you and your child can begin this. The ages mentioned below have worked consistently for all 4 of my children.
However, the age you begin is not as important as following the progression of steps. Begin when you and your children or students are ready.
1. Scribble on paper.
First, sit next to your 18+ month old and or the child you are watching. Let him or her scribble and scrabble. This will usually only last several minutes each time. Follow the interest of the child. Whenever the child indicates that he/she wants to draw, allow him or her to do so.
Although, don’t allow your child to draw anywhere and everywhere. Toddlers will draw on themselves, all over a desk, the floor, the wall etc. They have no idea what they’re boundaries are until you teach them.
Gradually, over time, talk with your child about how “We only draw on paper. Stay on the paper.”
Additionally, try to say the color of marker that they have in their hand each time. This is a super easy and natural way for your child to hear and learn color words.
2. Slow down.
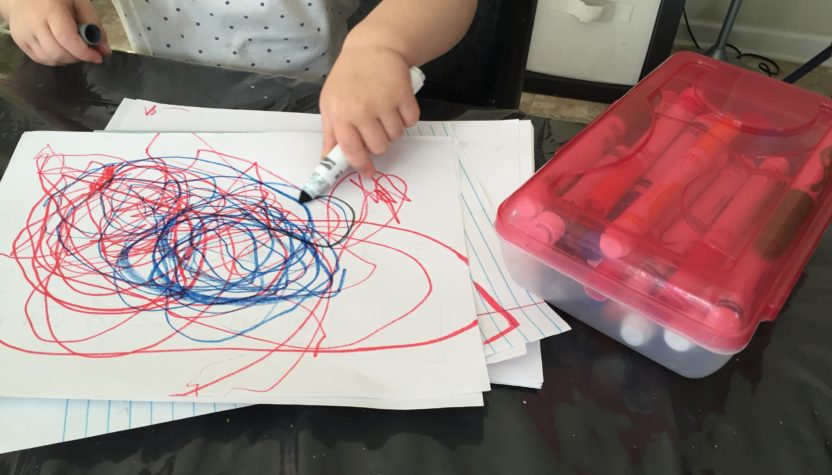
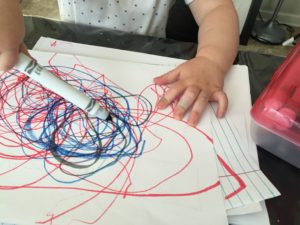
Second, teach your child to slow down. As your toddler gets used to scribbling and scrabbling, show your child how to draw slow scribbles as if you’re coloring in a section of the paper.
Most children will start off speed scribbling in a reckless manner all over the paper and off. That’s okay for a while. As time goes on, it’s okay and appropriate to gradually and patiently teach them to slow down. Be in charge in a gentle matter of fact way. Reward their cooperation with calm and sweet praise. They can start doing this between 24-30 months.
Their drawings might look like this image, with little spots of color. Again, they’ve moved from scribbling all over to small concentrated spaces. This shows that the child has more control of the marker and is increasing in fine motor strength.
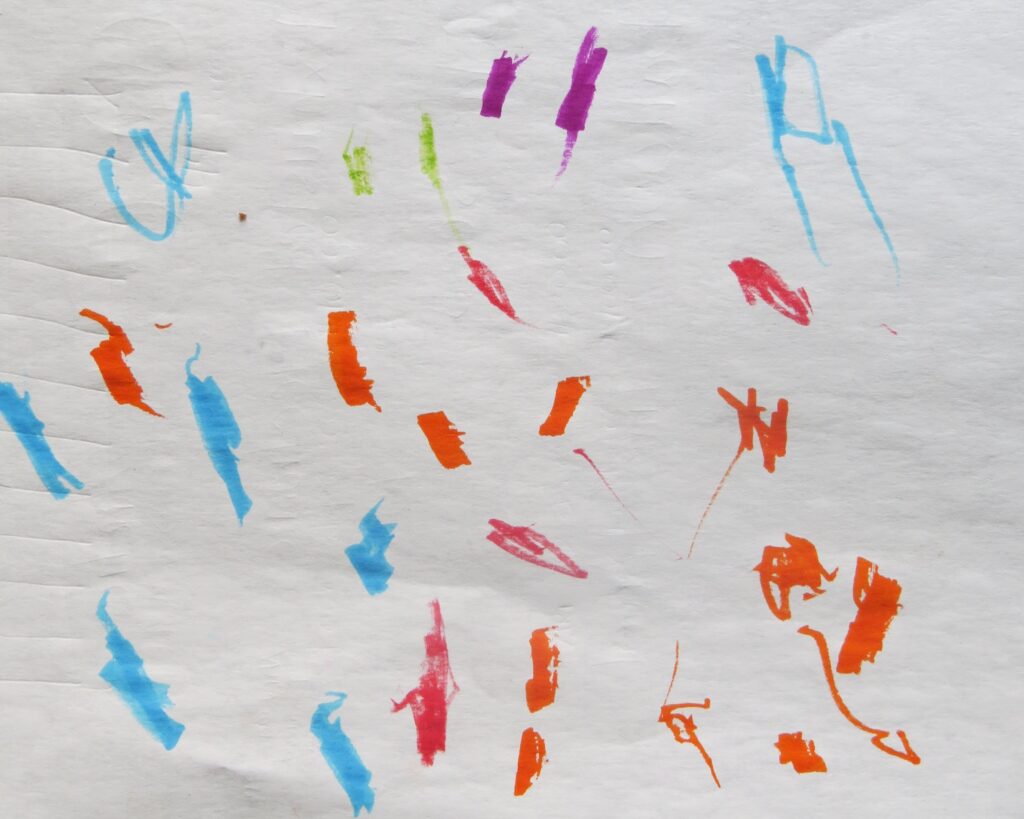
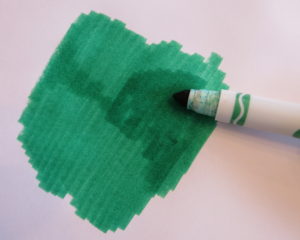
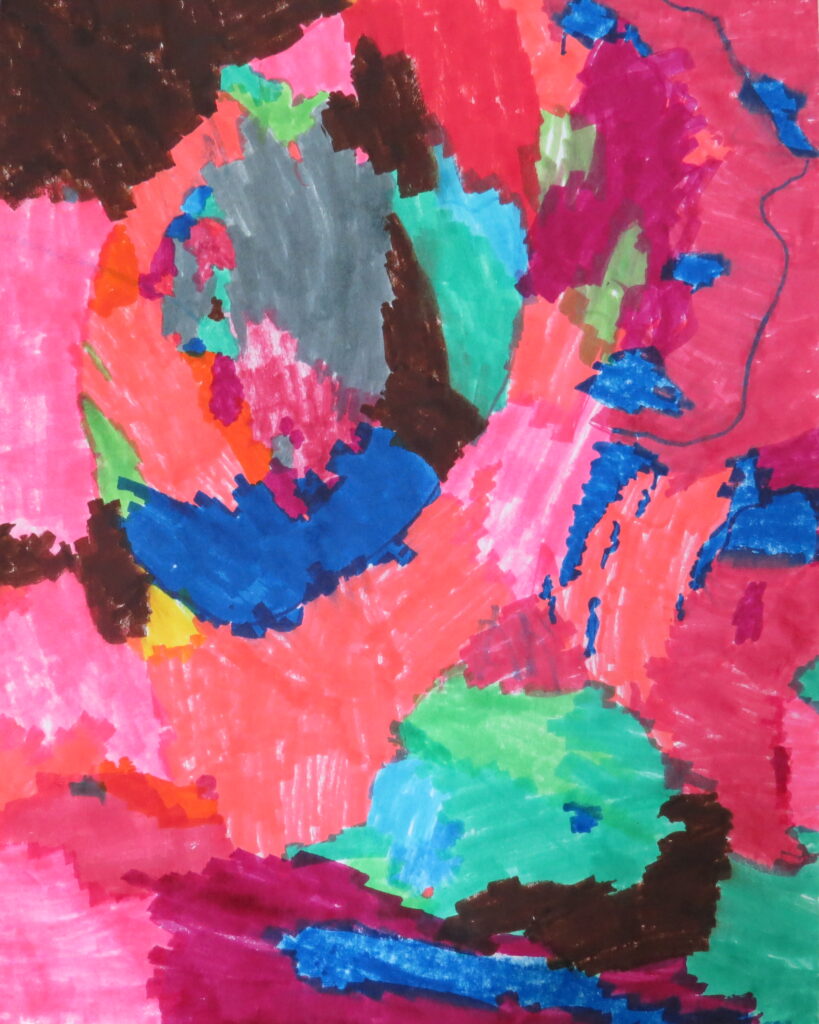
A child spending time coloring larger sections over time can eventually look something like this:

3. Circles
Third, around the age of 2 1/2, start drawing circles. Draw several circles on a piece of paper. Then, gently take your child’s hand and guide it to draw a circle. Start at the top and move the marker counterclockwise to foster proper letter strokes for later.
Gently and consistently guide the child to draw circles COUNTERCLOCKWISE. This will set them up for success when it comes time to learn how to draw an O along with the capital letters C, G, S and the lowercase letters a, c, d, g, o and q.
Additionally, this is a great time to do some of the activities from my post titled, “A CIRCLE SUMMER!”. Being able to draw counterclockwise circles is monumental in building confidence and comfort in young writers.
Ultimately, it causes their handwriting to be fluid, natural and smooth. I address handwriting in my post “Letter Strokes-Are They Important?”. All it took for me was our school occupational therapist to visit my Kindergarten classroom and tell me, “Yes, they are!” Click on that post to learn more.
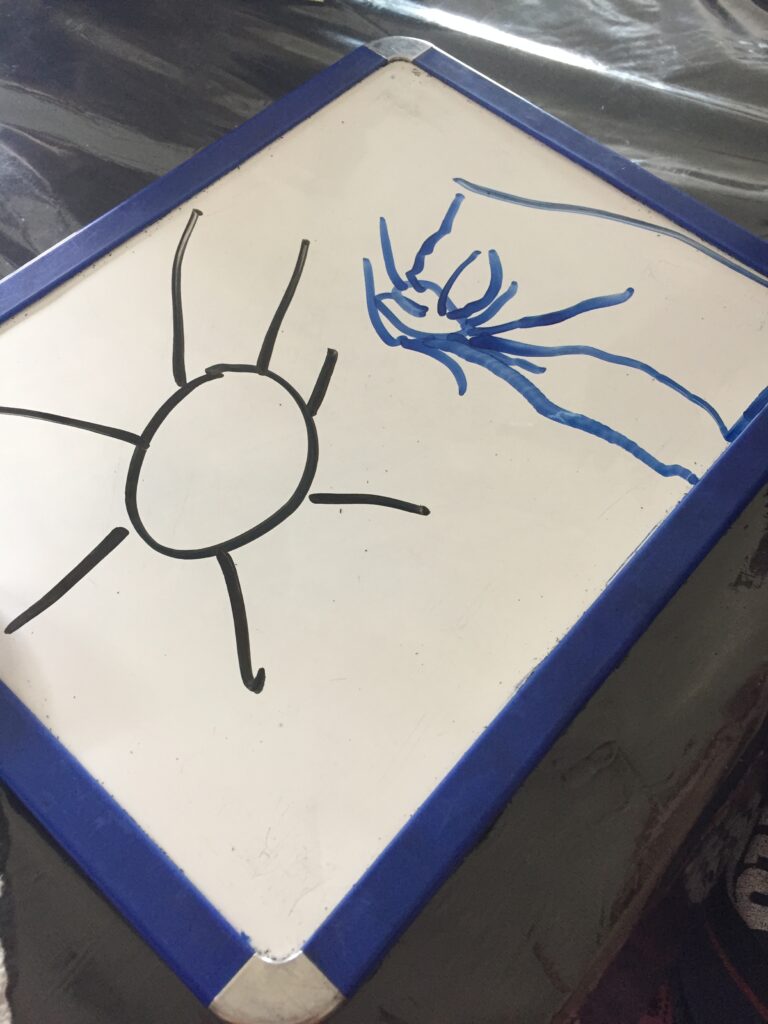
The Sun
When drawing circles with children, I like to start with the sun. Here are the simple steps that I take:
- Draw the circle.
- Then, ask the child to draw the sun’s rays on the circle.
- Third, draw another circle and ask the child to draw their own circle.
- Fourth, draw rays on your sun and ask the child to try to draw rays on their sun.
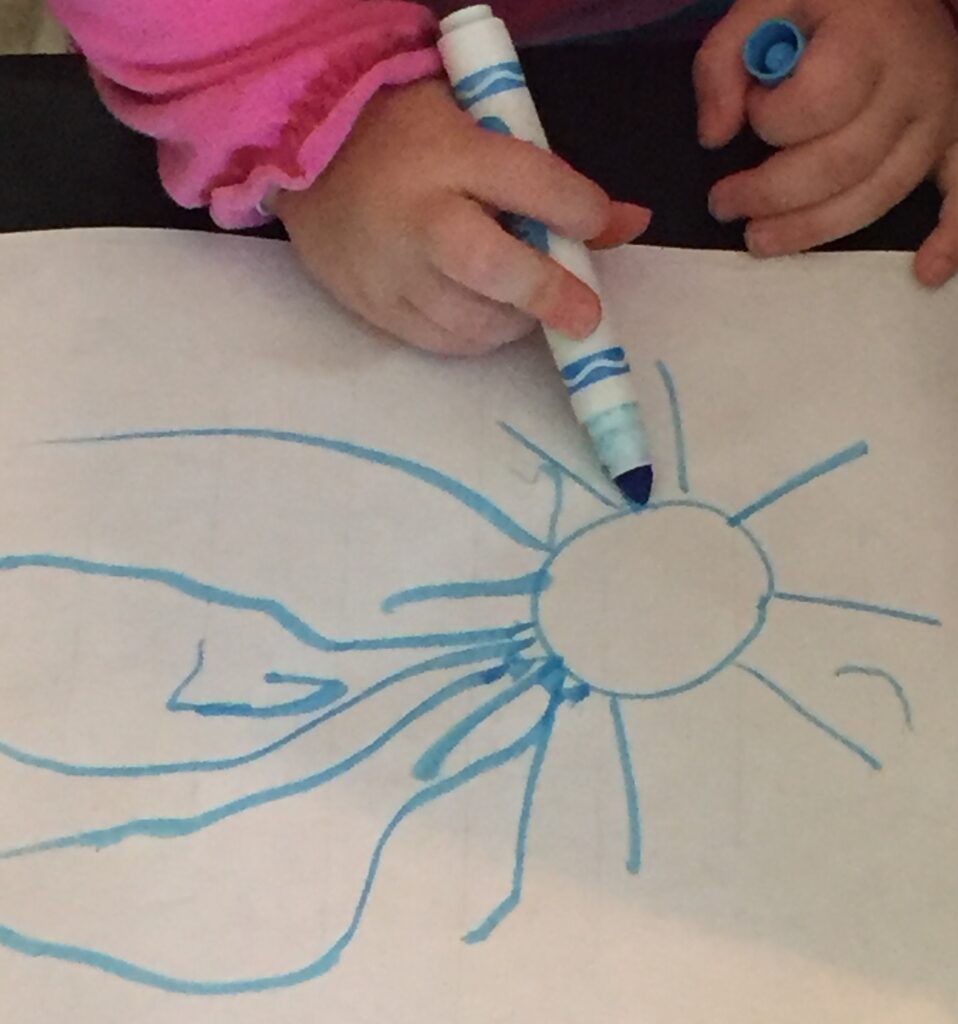
These activities usually only last a few minutes, but they are highly effective. When you see that your child is getting tired or uninterested, put the materials away and continue another day.
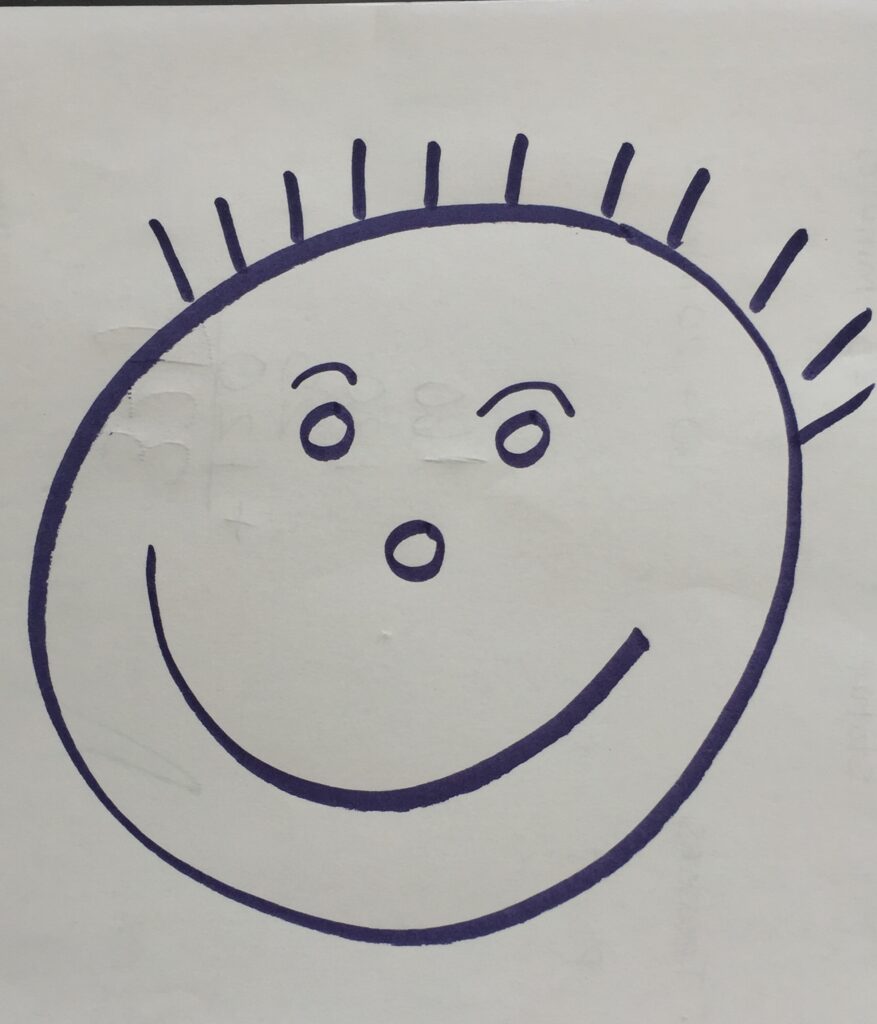
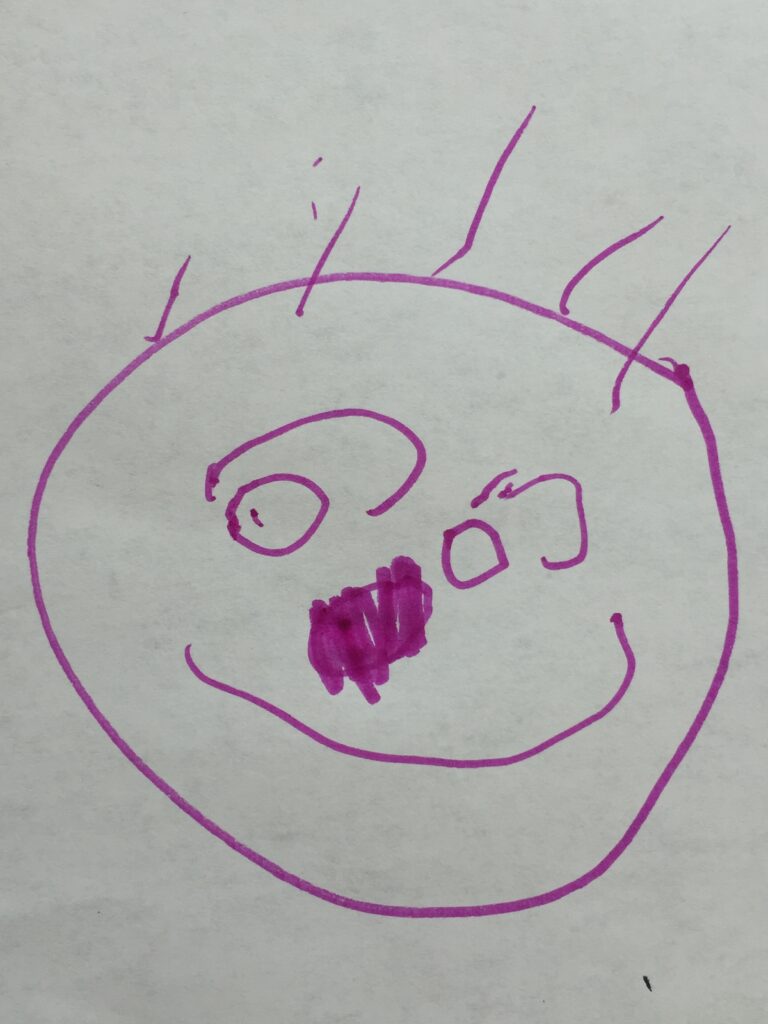
Smiley Faces
For the season that you’re working on circles, be sure to make smiley faces naming “eye, eye, nose, mouth, hair.” The child will surely smile at your drawing! Have fun with it! Gently guide your child’s hand to draw one. As your child gets older, you can add more details. In this example, I added eyebrows. My daughter did the same.
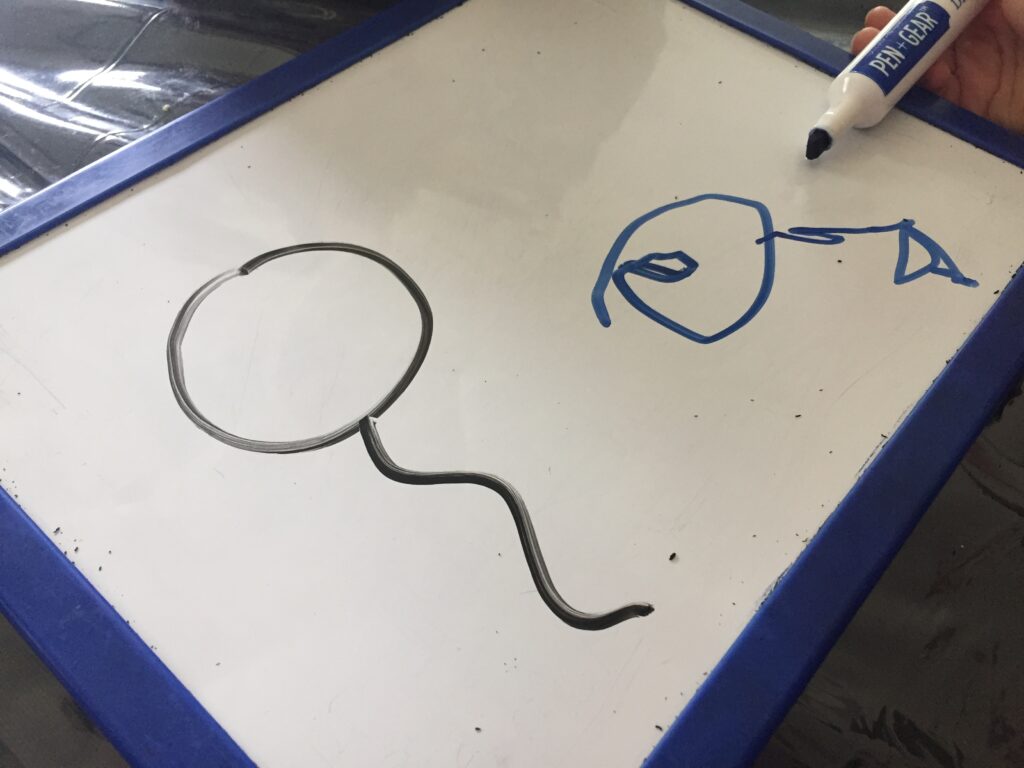
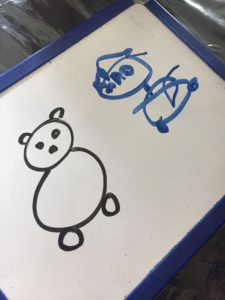
4. Draw Side By Side
If you’ve been sitting with your scribbler periodically from the age of 2, by age 3 (some sooner, some later) they can start drawing simple pictures next to you.
When you draw with your child, both of you should each have your own piece of paper or space. Draw and talk about what you are drawing. Have your child try to draw the same line. Step by step, line by line, complete simple pictures.
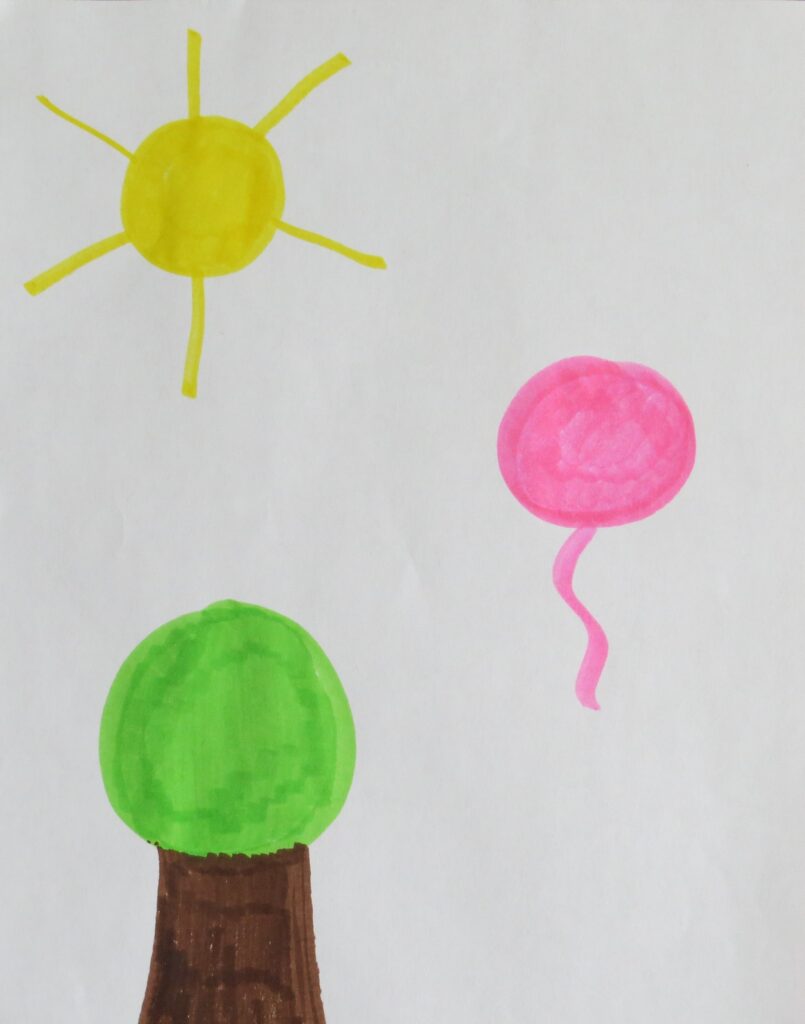
A week before my daughter’s 3rd birthday, we drew a sun, a balloon and a bear. Her drawings weren’t exact. They weren’t supposed to be! It was a start. And she loved doing it!

Remember, when you see that your child is getting tired or uninterested, put the materials away and continue another day.
5. Shapes
Fifth, around age 3 continue drawing circles and begin drawing other shapes. Then, turn the shapes into something. Name the shape each time you draw one. This is a super easy and natural way for your child to hear and learn shape words.
Have your child try to draw the shapes themselves and turn them into pictures. Over time, continue with squares, ovals and diamonds.
6. Keep Drawing
Lastly, keep drawing with your child regularly until they begin Kindergarten. Set aside time for you and your child to draw freely. Additionally, talk about what you are drawing in your picture. Ask your young children to talk about what they are forming in their pictures. Their endearing answers will surely make the time so worth it!
Finally, continue to draw side by side as your child expresses interest or you feel inspired.
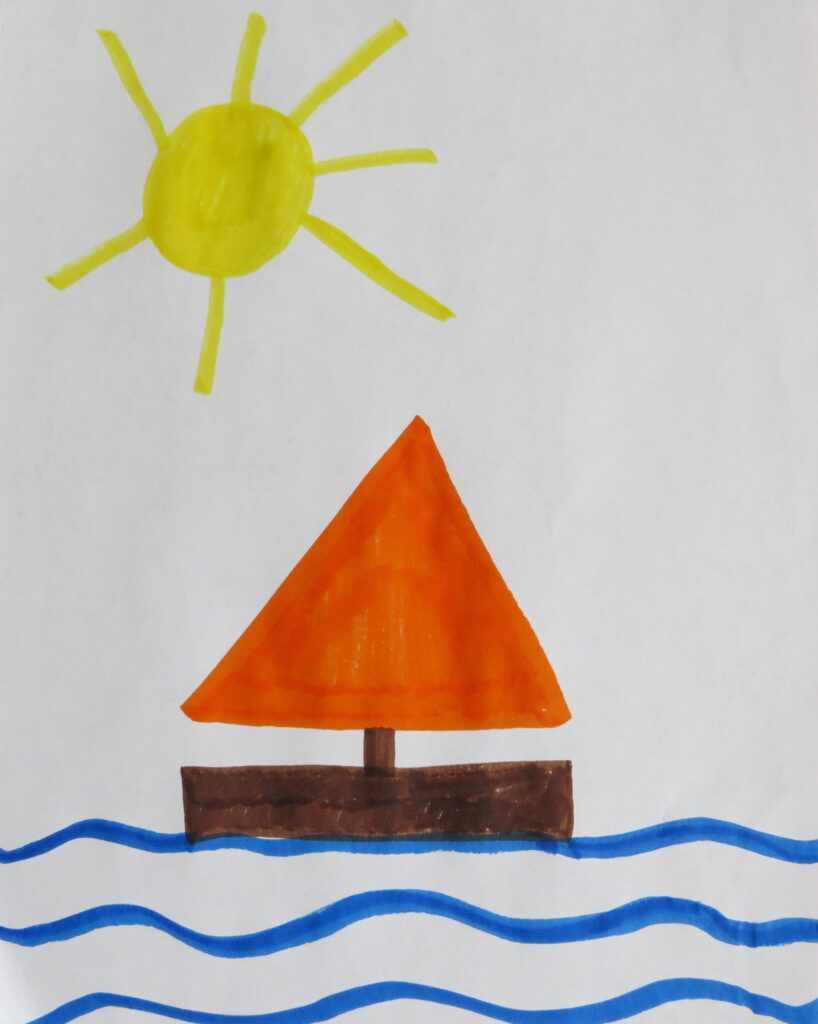
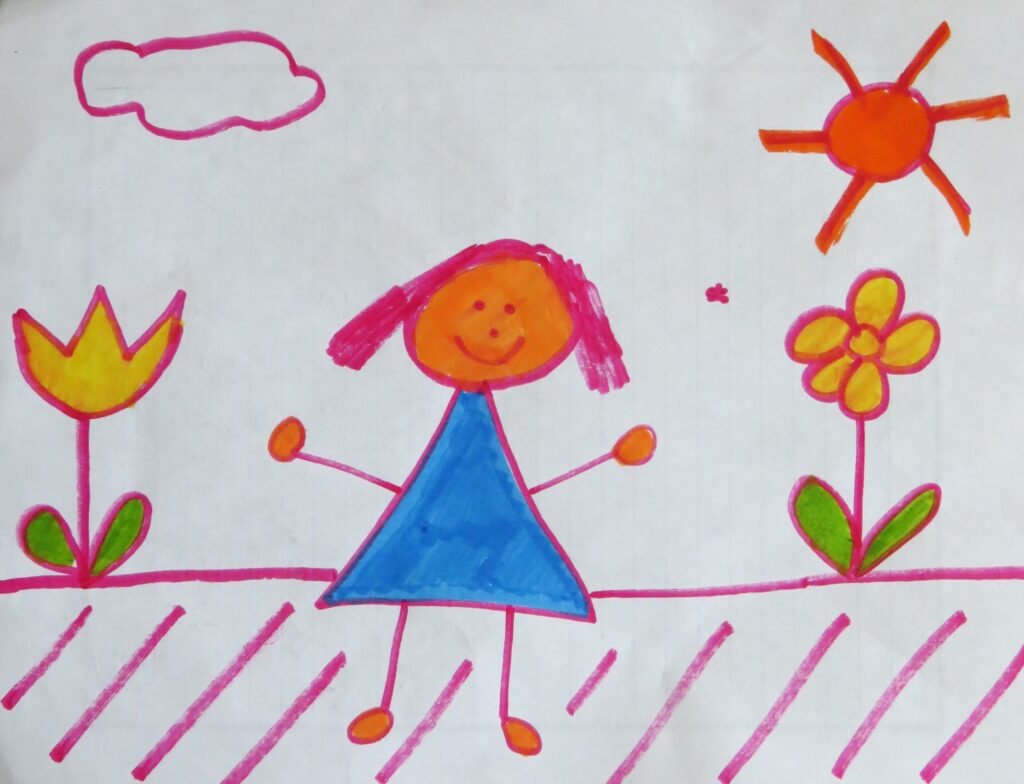
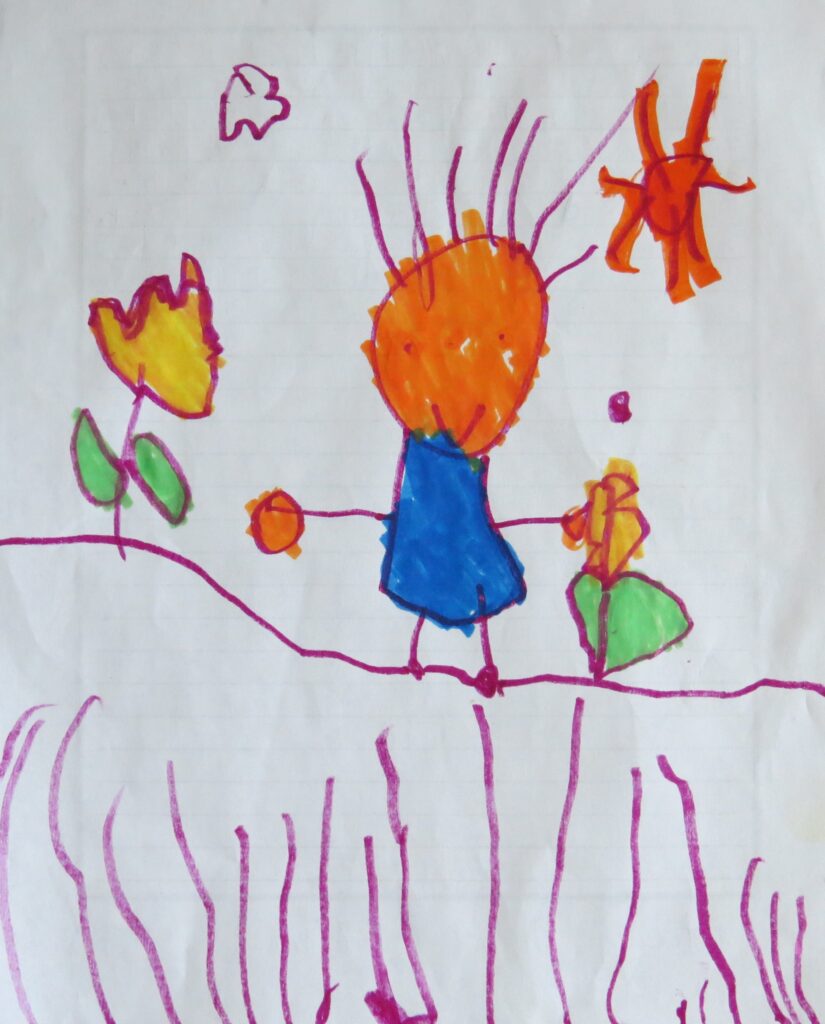
My daughter is now 4 and a half. The other day, she told me she wanted to draw a person. We sat down together. I had my own piece of paper. She had hers. Step by step we drew a person, two flowers, the sun and a cloud.
Here’s a picture of our drawings.
A Great Investment of Time
Taking the time to draw with your child at an early age has so many benefits! Not only do you create fond memories, but you also help your child build strong motor skills, vocabulary and imagination.
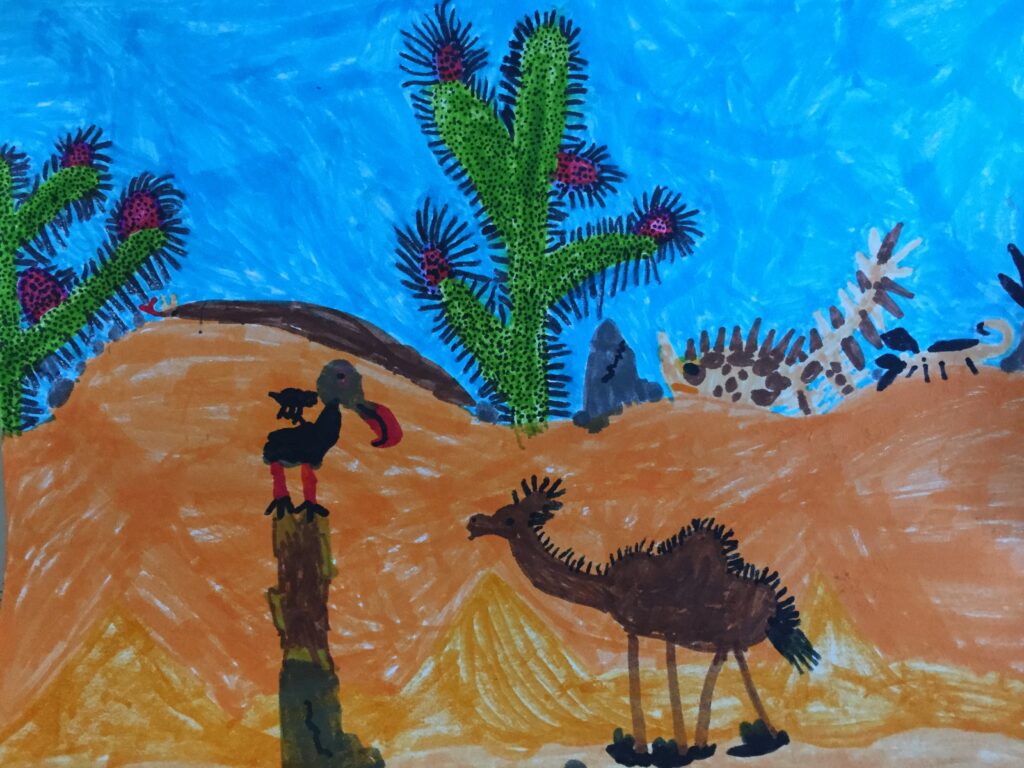
As a result of this quality time, children grow to draw independently. My oldest son is now 6 1/2 and still drawing! Over the course of a few evenings, he drew this desert picture all by himself.
Drawing independently becomes especially important when you want your child to enjoy something other than screen time while you’re cooking, working, putting younger children to bed, etc.
In addition, when it comes time to sending birthday cards, Mother’s Day, Father’s Day, Grandparents’ cards, these children are usually eager and able to add delightful drawings to them.
Above all, children who have the patience and fine motor strength to draw pictures, typically have the focus and stamina to “draw” letters and eventually write words, sentences and stories! In turn, these children often grow to be comfortable and confident writers all the way through school and on into their careers. Drawing with your children can truly have long term benefits!
Print the Steps!
Now What?
Your young child is drawing independently. Now what? How do I turn my child’s drawing into writing?
Store the Drawings in a Binder.

By 5 years of age, start storing your child’s work in a binder to use for writing and reading later.
Turn Drawing into Writing.
Now, your child is ready to start writing! Click on Help Your Child Learn to Write-10 Strategic Steps to begin writing with your child!
High Quality Online Drawing Lessons
Lastly, give your child the opportunity to learn more advanced drawing skills by trying these online videos by www.artzhub.com! The first class is FREE!
My friend and now co-worker mentioned above teaches these lessons. She is excellent and your child will surely love her classes! Her gentle step-by-step approach is great for children as young as four years old and for the entire family!
Students and Adults
Students and adults of all ages take her classes and enjoy them. I can HIGHLY recommend Artzhub.com for online drawing lessons!