
In this post, kids build a 4 tier shelf. Then, they write their opinion about the process! This post includes two printable PDFs. The first PDF is of the building instructions. The second one is of the guided writing lesson. Now, learn how this building project came about!
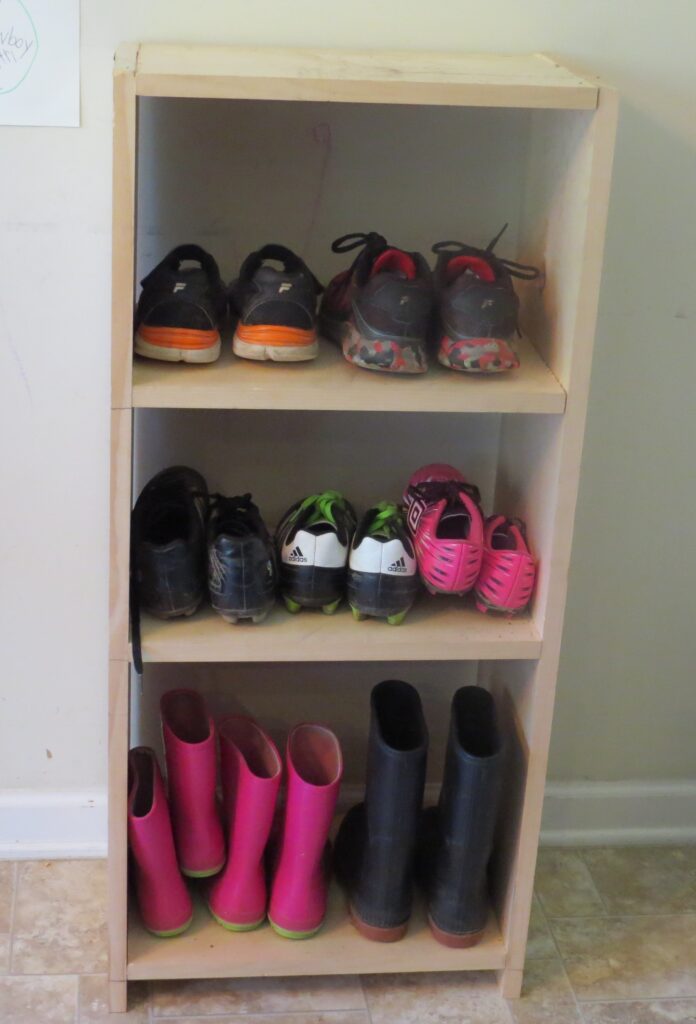
I got so tired of lining up 8 pairs of boots and shoes at our back door. Plus, when I did line them up, they really didn’t fit in the small space that we had.
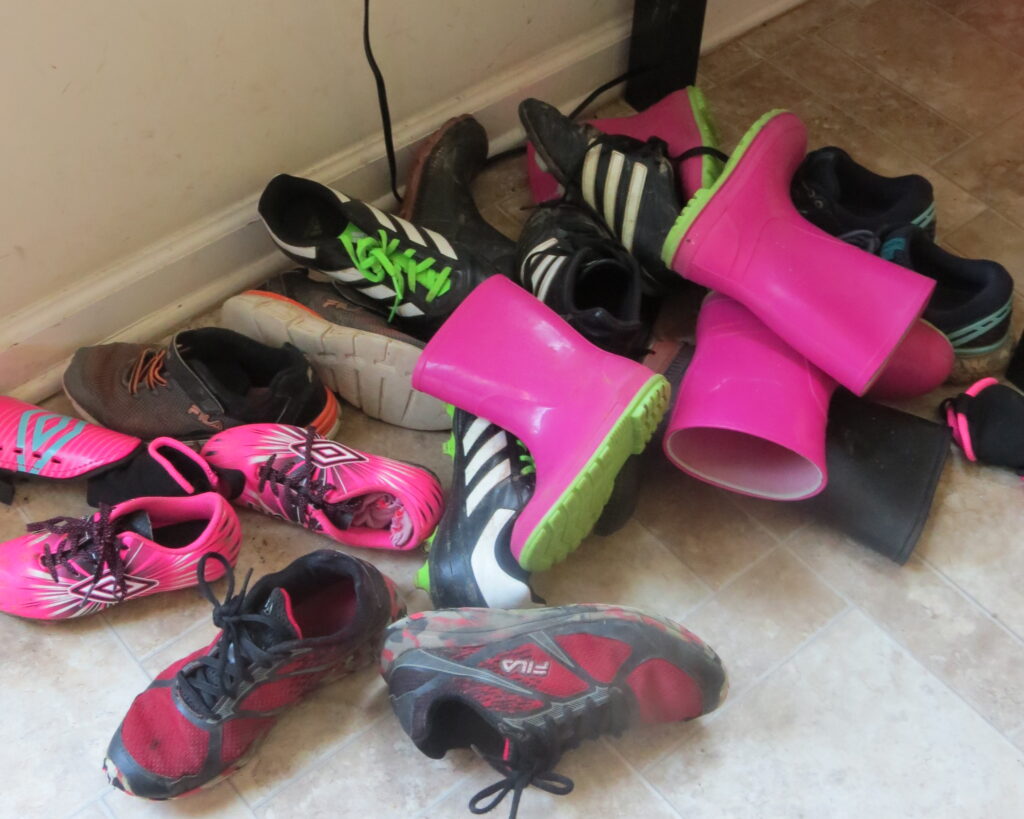
Time to Build a Shoe Shelf
So, we needed a shoe shelf! Since my kids had already built their own book boxes and simple shelves, I knew they could build a shoe shelf for the family, no problem!
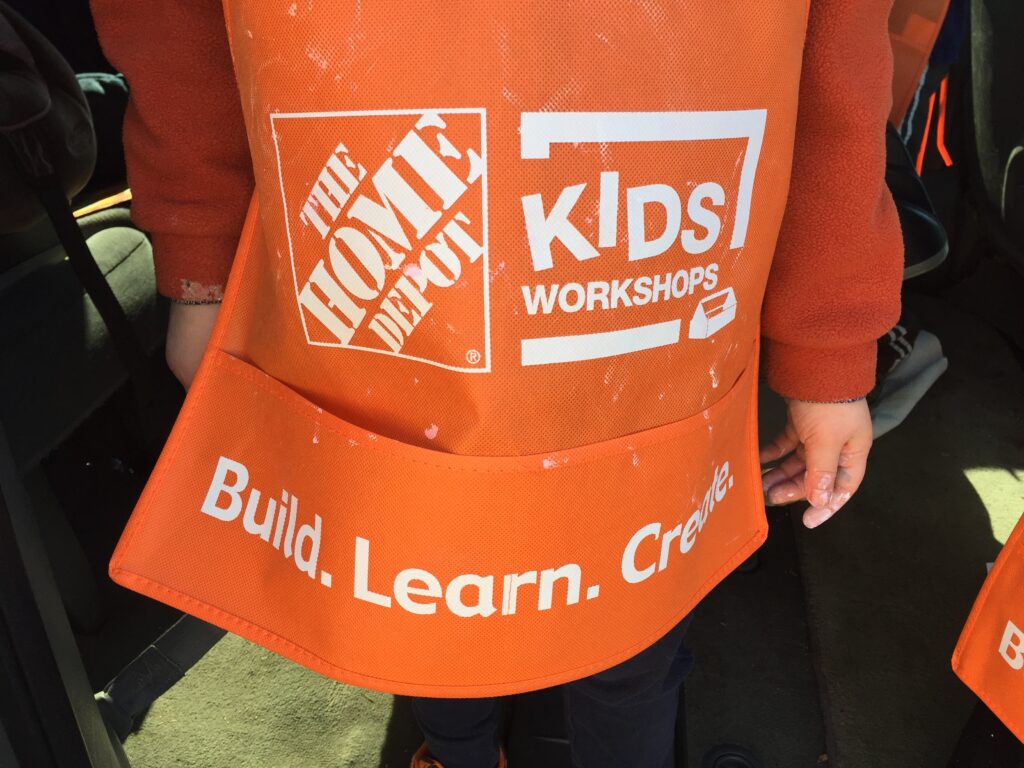
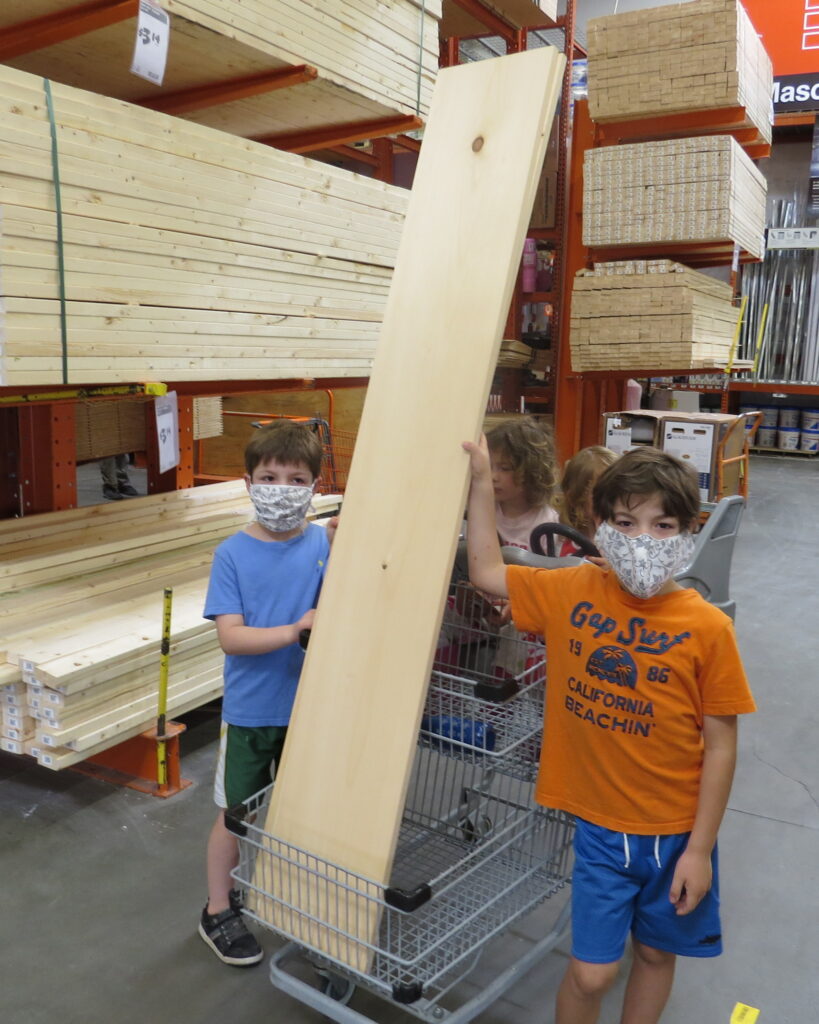
The next day, I took them to Home Depot for our third building project and we got it done!
Now, I know there’s at least one other mom out there tired of lining up shoes and boots. If not that, I’m sure there’s a mom that has books scattered all over her living room floor begging for one more sturdy shelf.
Classroom Teachers Can Build
Lastly, as a former full time school teacher, I LOVED shelves! I always had a reason for a shelf. Any size or shape of shelf had a very useful place and position in my classroom.
If you’re a classroom teacher, your kids can build a 4 tier shelf too! You can print and follow the blueprint below and set up a building center that you, an assistant or a parent can lead at the beginning of the school year.
Each student can hammer in at least 5 nails and drill in a screw. It might be a little loud. But, what better way to get your kids excited about hands on building! They will have a cheerful memory and a heart full of pride each time they look at the shelf, knowing they helped build it.
Building Projects 1 and 2
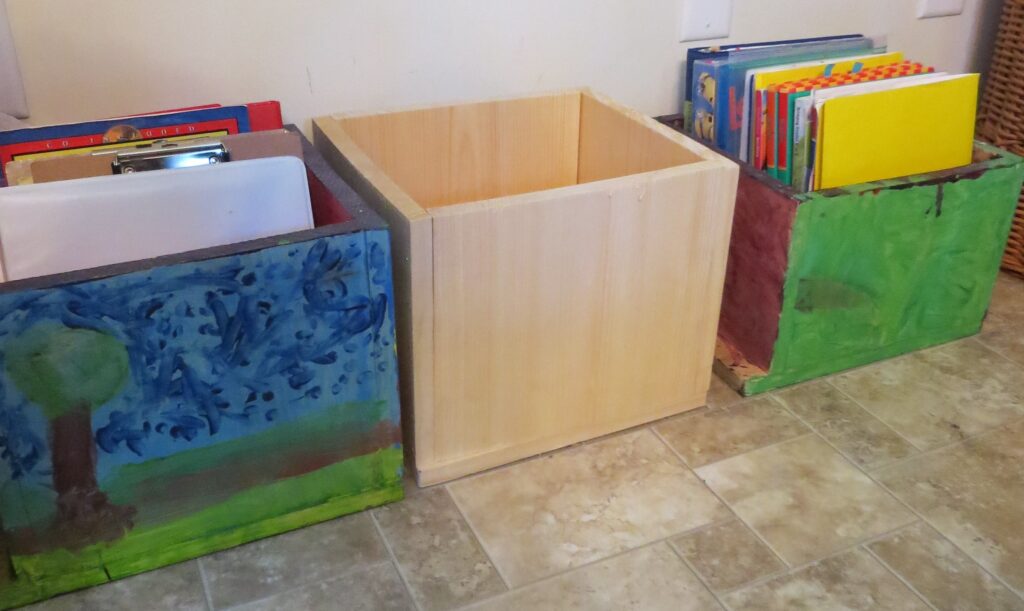
My kids love to build! As I mentioned before, this multi-purpose shelf is their third building project here at home. So far, they’ve built their own book boxes. My 4 year old daughter’s box is in the middle. She still needs to paint hers. These building projects are great for children as young as 4 and for boys and girls alike! Learn how to build your own book box here!
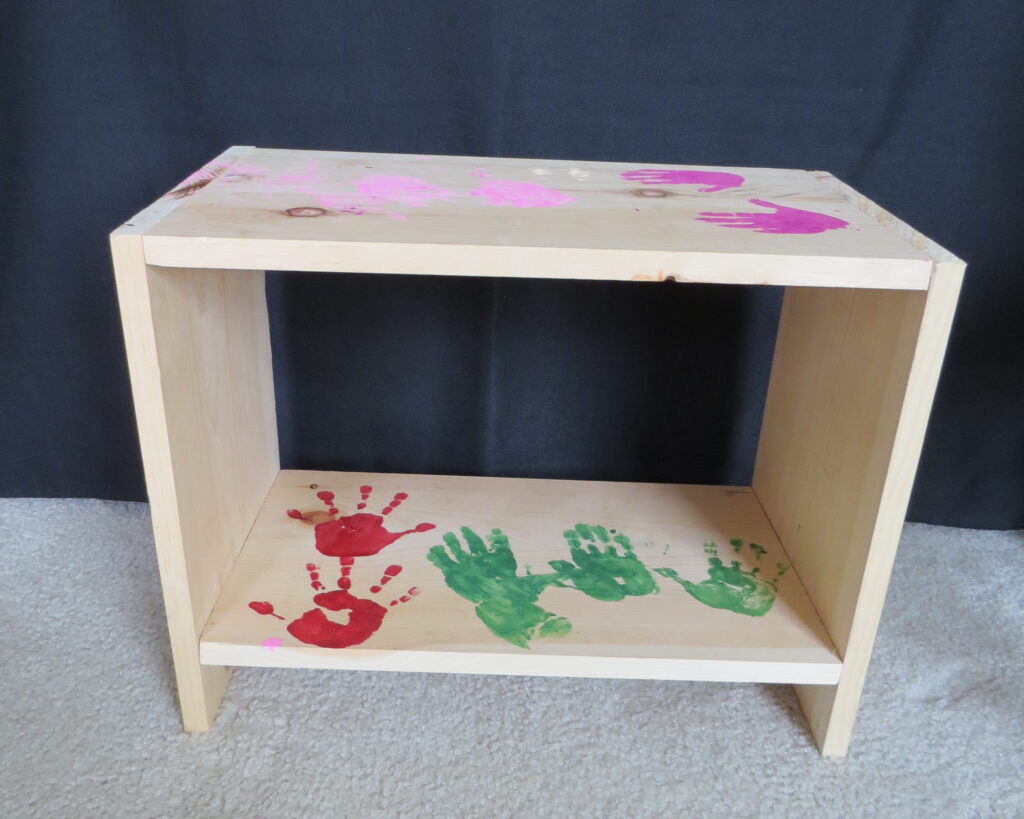
Then, they each built their own simple shelf. The boys placed their shelf in their closets. My daughter has hers in the living room. Learn how to build your own simple shelf here!
The Cost to Build a 4 Tier Shelf
Before I go into the steps to build a 4 tier shelf, I want to tell you up front the cost of these projects. One book box requires one piece of wood 6 feet by 1 foot which costs $16, plus some change. One simple shelf costs the same. You can find complete instructions to each of these projects in their respective posts highlighted above.
The 4 tier shelf requires TWO pieces of wood which amounts to a $32+. I don’t know if you think these prices are great or not.
High Quality Products and Life Skills
BUT, what I can tell you is that I’ve never seen a wooden book box available for purchase in a store. There are plenty of plastic and wicker boxes. In fact, my kids and I went through what felt like dozens of plastic and wicker bins to hold our books and they ALL fell apart eventually.
As a result, I came up with the wooden book box idea because I knew it would be a permanent fix to storing our school books. My kids can stand on their book boxes. I’m certain these wooden book boxes will last their life times which is a precious treasure to take into their adult and parenting lives. The same goes for their simple shelves.
Plus, I loved the idea of my kids hammering and building! I bet most of your kids will love constructing too. So, I just can’t help myself. I HAVE to share these ideas. Additionally, passing these ideas onto you, might ignite an interest and liking for life-long building in your kiddos the same way it is doing so in mine! My oldest son told me that he wants to build something with a hinge next time…
Incorporating Writing
What does building have to do with writing? After my boys built their book boxes, they wrote out the instructions on how to do it. You can find that guided writing lesson here.
Another idea is to have your children write out their opinion about the building project. That guided writing lesson will be at the bottom of this post and will include a PDF printout. In fact, you can use the opinion guided writing lesson after building the book box, the simple shelf or this multi-purpose shelf. It works with ANY building project.
No Time at All to Build a 4 Tier Shelf!
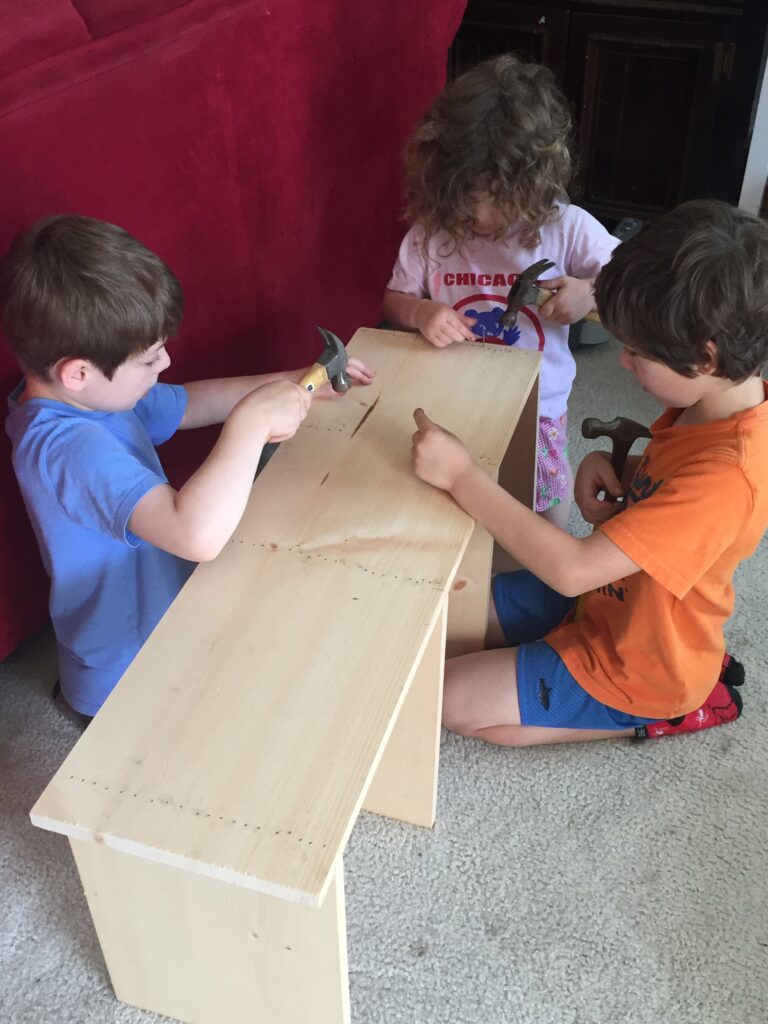
Now, let’s move on to the multi-purpose shelf building project! To give you an idea how easy this shelf is to build, it took my 3 children (ages 8, 6 and 4 1/2) 90 minutes. That included me making a few big mistakes that required us taking out two rows of nails AND us stopping often to take pictures for this post.
You won’t be making the mistakes or taking pictures so I’m sure you and your crew can knock it out in 30-60 minutes. The trip to Home Depot will add some time of course, but the actual building really doesn’t take long at all.
Getting Your Materials to Build
I will include a PDF printout of these instructions at the bottom, so no need to take notes. In order to begin, you’ll need a few materials:
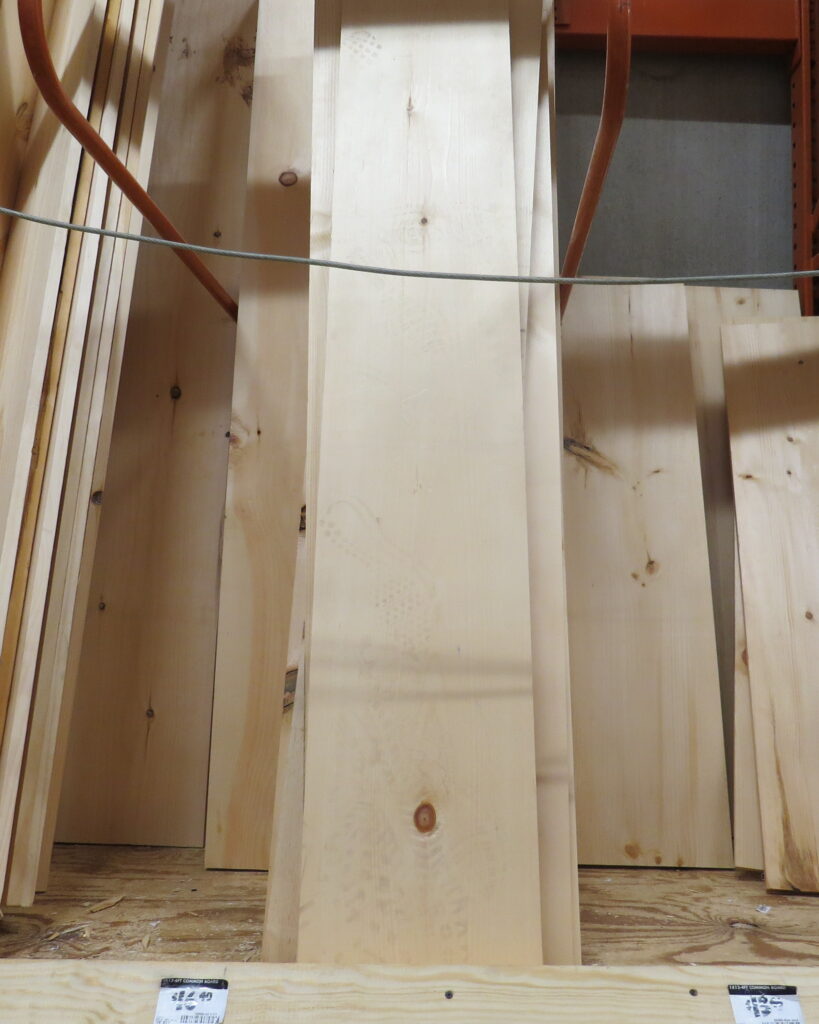
- Two pieces of wood that are 6 feet by 1 foot by 1″
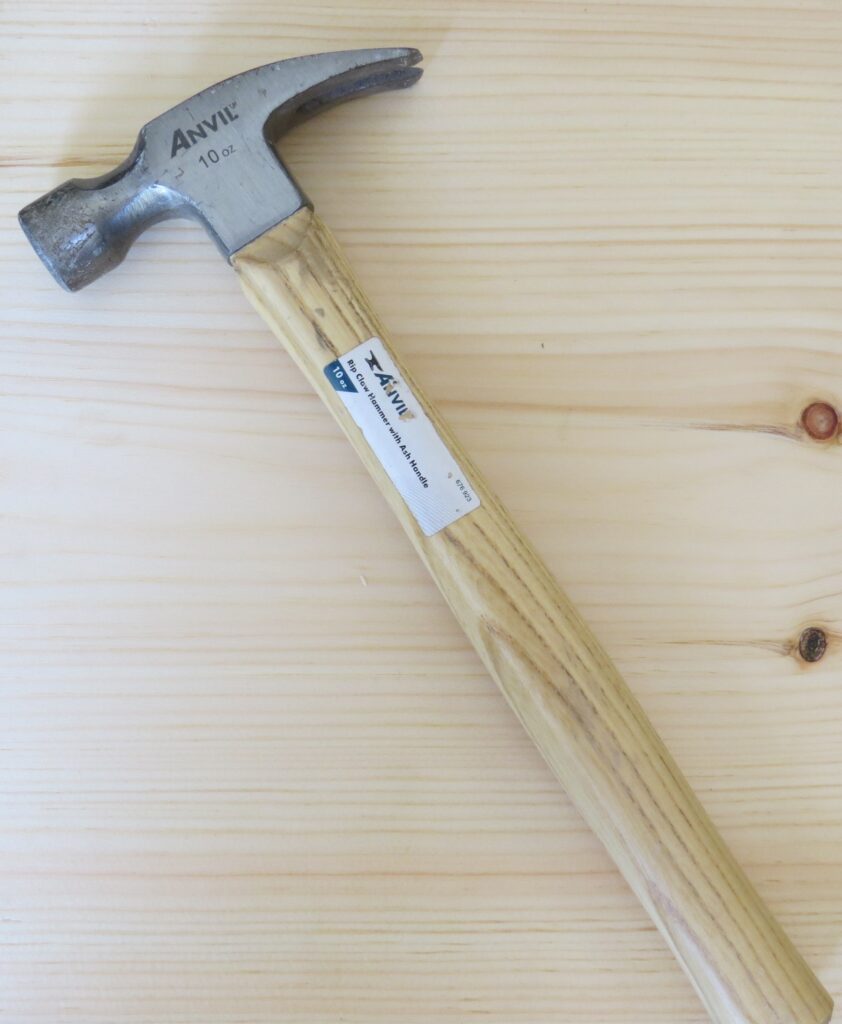
- A light weight hammer
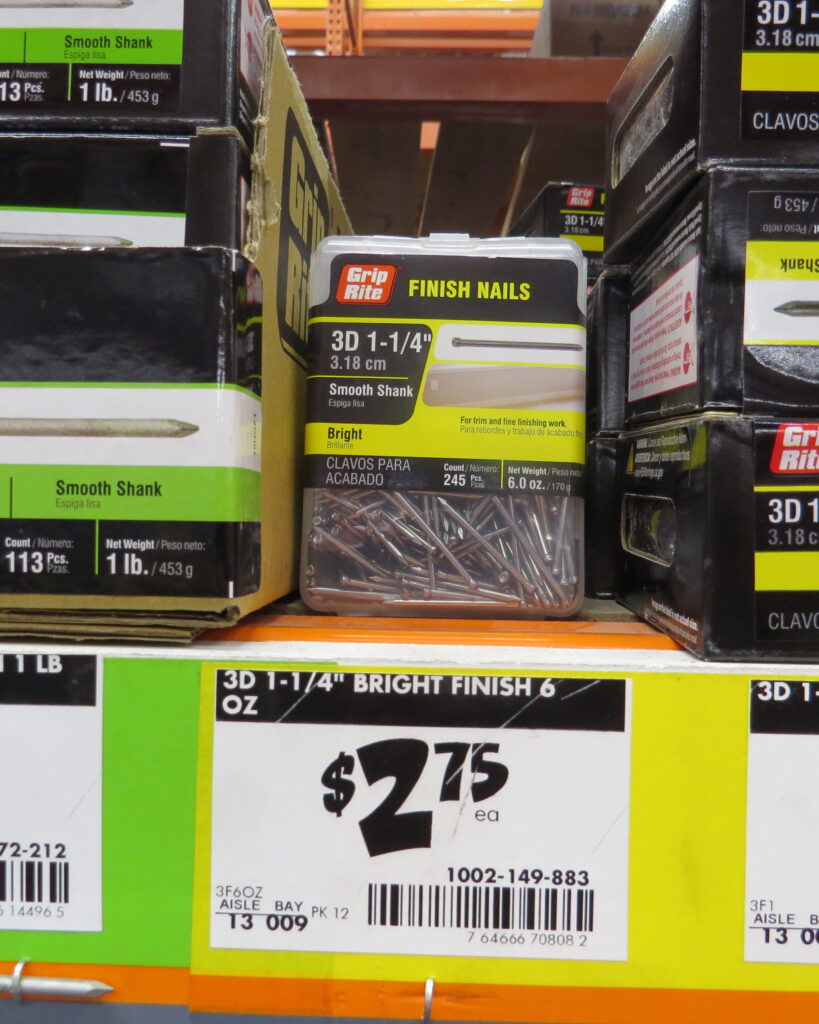
- A box of 1 1/4″ nails
- A battery operated drill and 2 inch screws (OPTIONAL)
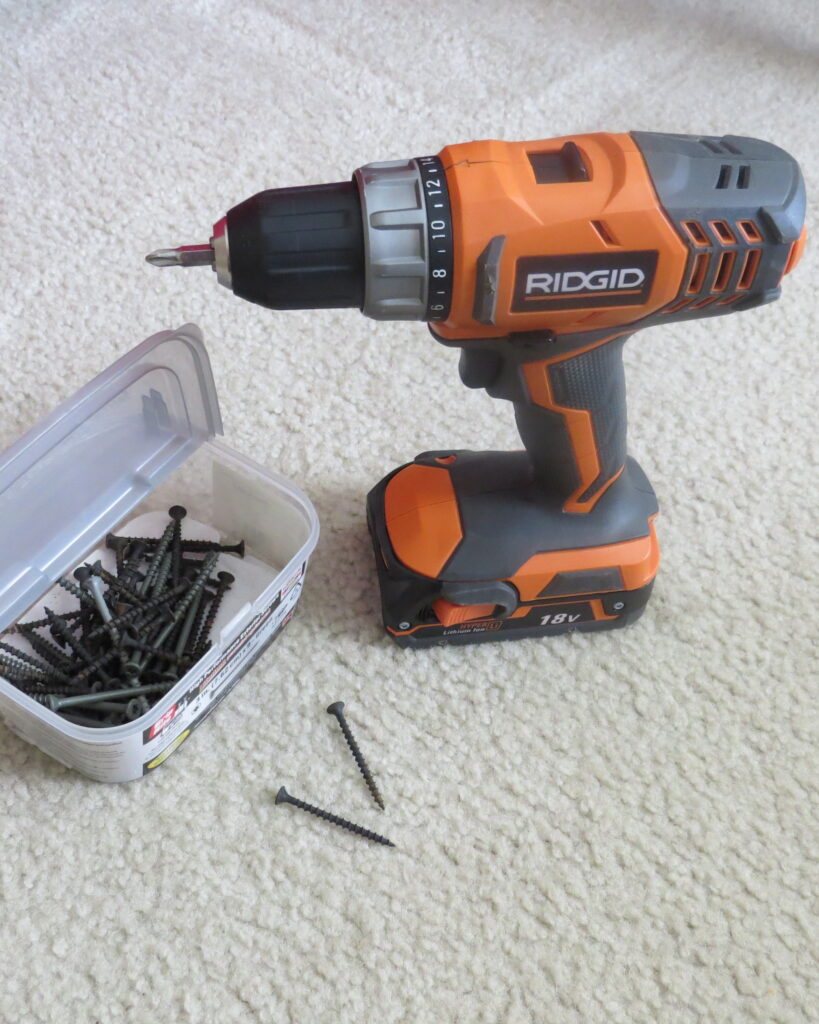
Nails vs. Screws
Please note, for the book box and the simple shelf, my kids only used a hammer and nails. Hammering in nails was very age appropriate for them at ages 4 and 6.)
However, I decided to allow the boys to use a hand drill and screws when building this multi-purpose shelf for 4 reasons:
- One, the boys are older (ages 6 and 8).
- Two, being their 3rd project, I wanted to add the skill of drilling.
- Third, the multi-purpose shelf is a bigger project.
- Lastly, the screws create a stronger hold, making the shelves even more secure.
Cutting the Wood
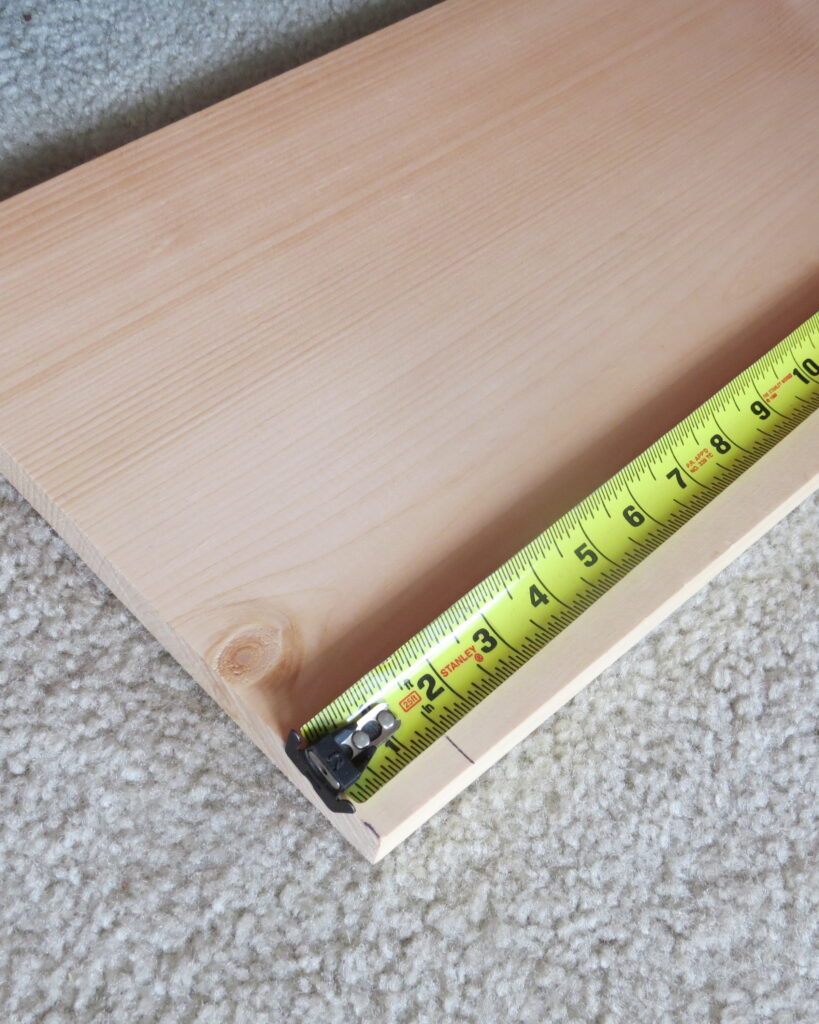
Once you get your two pieces of wood at Home Depot, you’ll need to take them to the store saw. Find an employee and ask them to cut each 6 foot piece of wood at the following marks:
- 38 inches
- 16 inches
- 16 inches
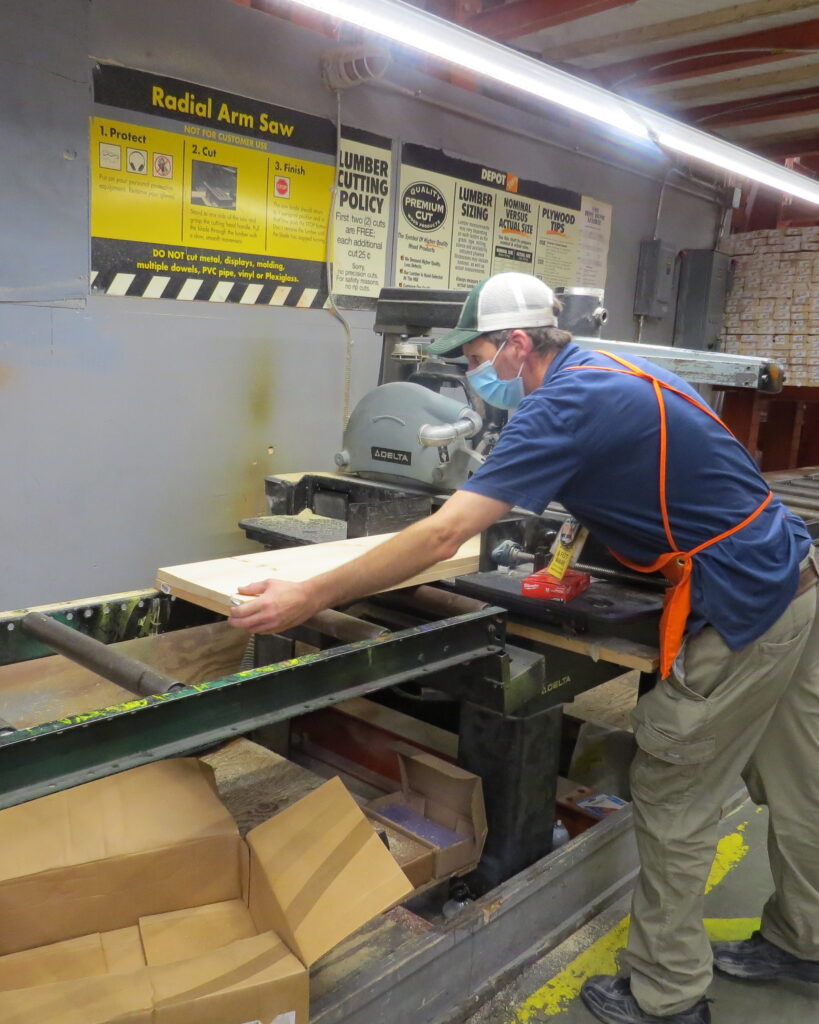
In the end, you’ll have 2 pieces of wood that are 38 inches long and 4 pieces of wood that are 16 inches long.
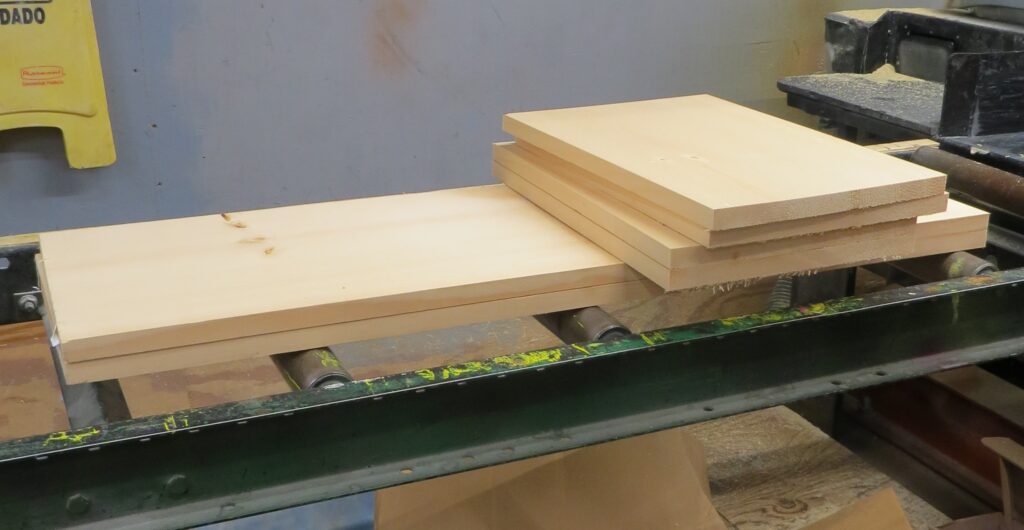
Please note, that the pieces of wood aren’t always EXACT. For example, the wood is supposed to be 12 inches wide, but sometimes it might only be 11 7/8″. Or, after the wood is cut, one piece of wood might be ever so slightly longer or shorter creating a gap when you piece it all together.
Thankfully, wood is pretty cooperative and nails and screws help secure any uneven gaps that their might be in the pieces.
Steps to Build a 4 Tier Shelf
Alright, let’s get building! Here are the steps for your kids to build a 4 tier multi-purpose shelf.

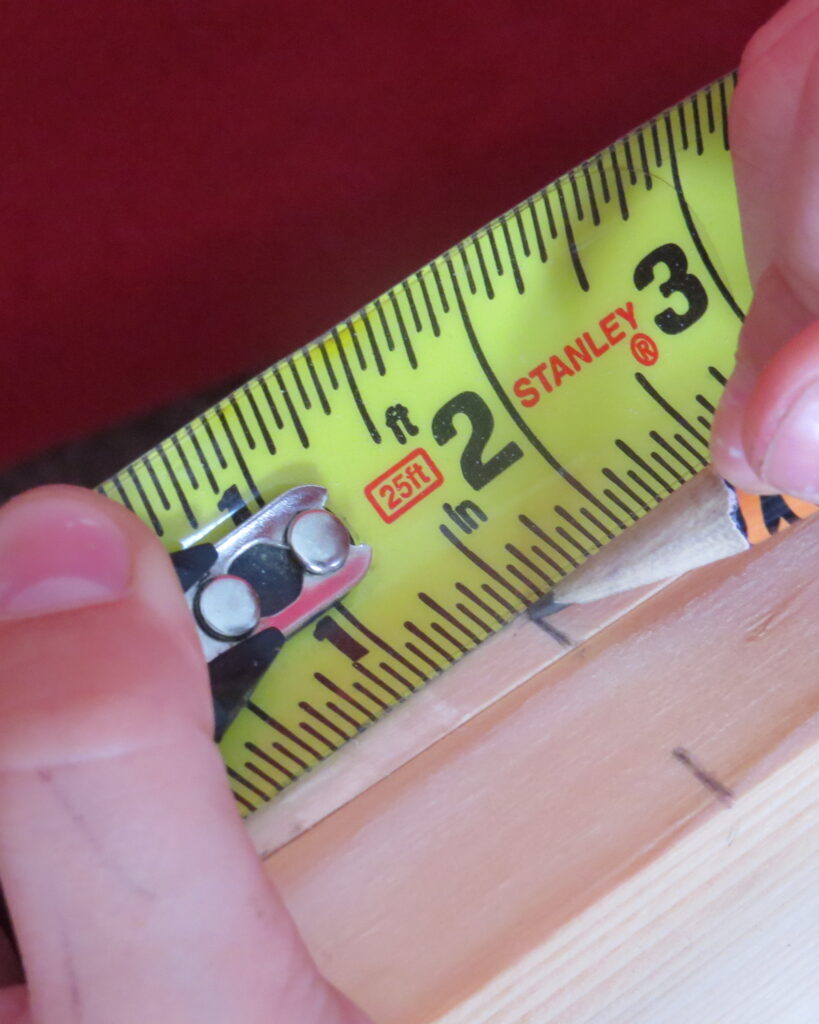
- First, measure 1 3/4 inches from the bottom of the two long pieces. Mark it with a pencil on both sides of the board. This gives you a bit of space under the bottom shelf.
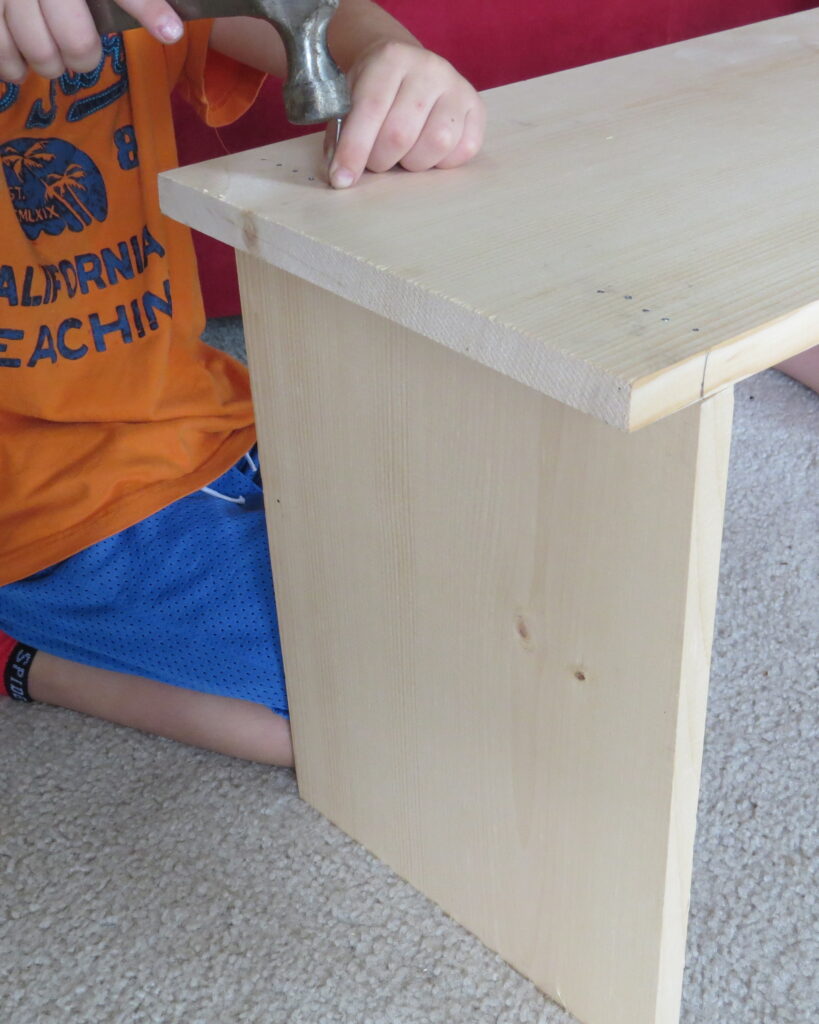
2. Second, line up one 16″ piece of wood under the pencil markings that you made. You will need 2-3 people for this step. One person holds the wood, while the 2nd or 3rd person hammers in the first couple of nails. This attaches the bottom shelf.

Continue hammering in nails along the entire row to secure the first side of the bottom shelf. A 2nd or 3rd person is still holding up the other end of the shelf. This is the hardest step. It gets easier.
At this point, you have successfully nailed the bottom shelf to the long side.
3. Third, measure 16 inches from the bottom of the long piece. Make a pencil mark at the 16 inch mark. Do this on BOTH sides, the right and the left side of the long piece of wood. Then, line up the 2nd shelf with the pencil marks on both sides.

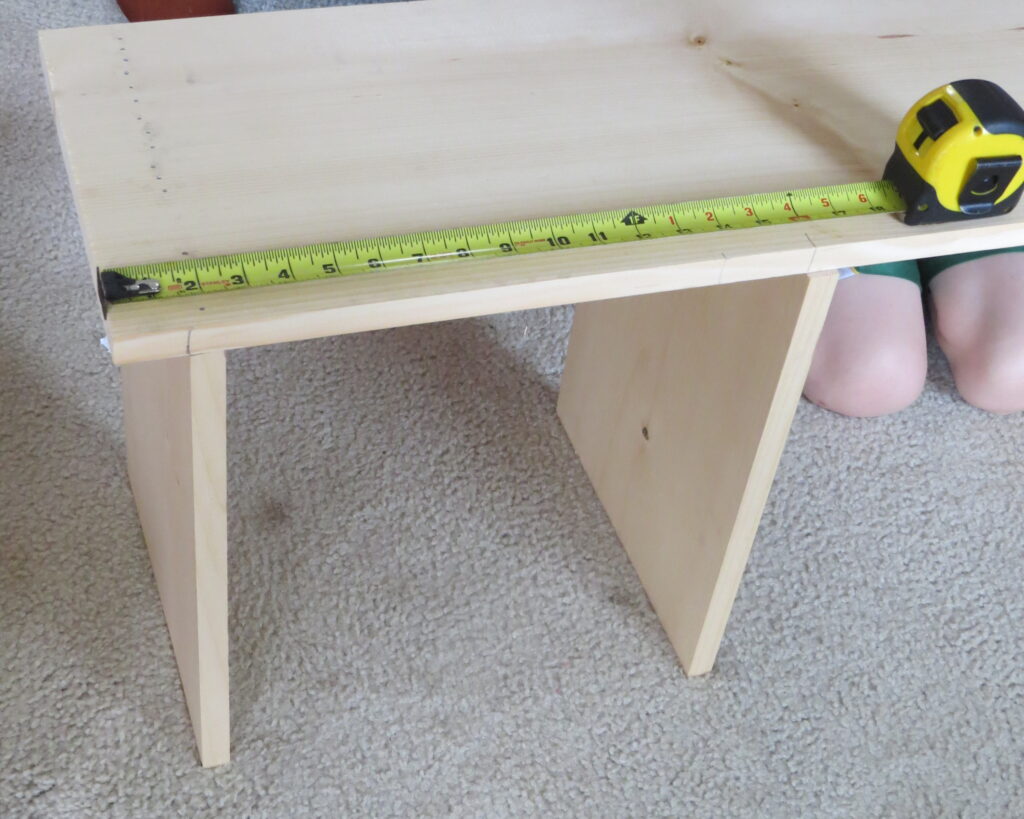
I wanted the bottom shelf to have more height space than the top 3 shelves so that tall boots or books could fit easily. That’s why I measure 16 inches this first time. (NOTE: You can space your shelves however far apart you want. If you do so, simply be consistent when measuring both sides so that the shelves are level.)
Next, line up the 2nd shelf. Hammer in a couple of nails on each side, then fill in the row with nails.
AVOID THIS MISTAKE
I originally thought it would work best to hammer in the shelves in this order: Connect 4 shelves into the 1st long side, turn it over and connect the 2nd long side to the 4 shelves.
However, because of the slight differences in board lengths, my 2nd side wasn’t lining up right. I can’t explain what went wrong here, just trust me, it didn’t work! So, my kids and I had to remove the rows of nails in the top two shelves. Ultimately, we successfully hammered the boards in this order:
- Connect the bottom 2 shelves to the 1st long side.
- Turn it over.
- Hammer the 2nd long side to the same bottom 2 shelves.
- Put the top 2 shelves in place and connect those with nails.
BACK ON TRACK
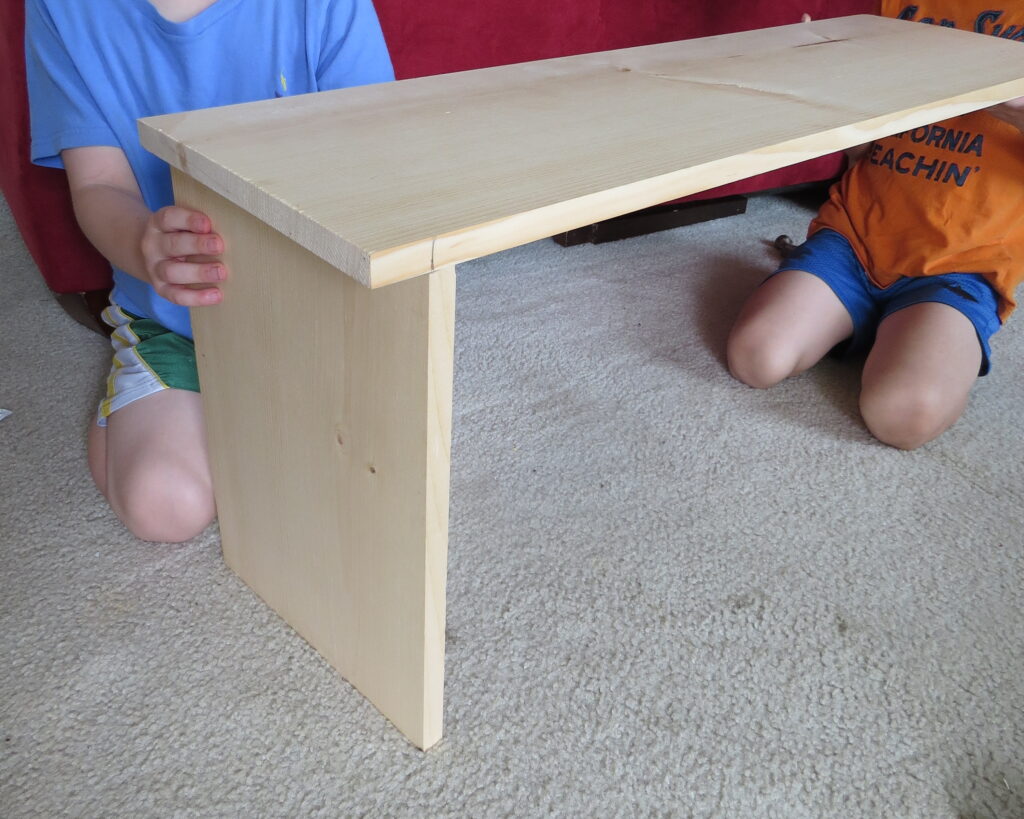
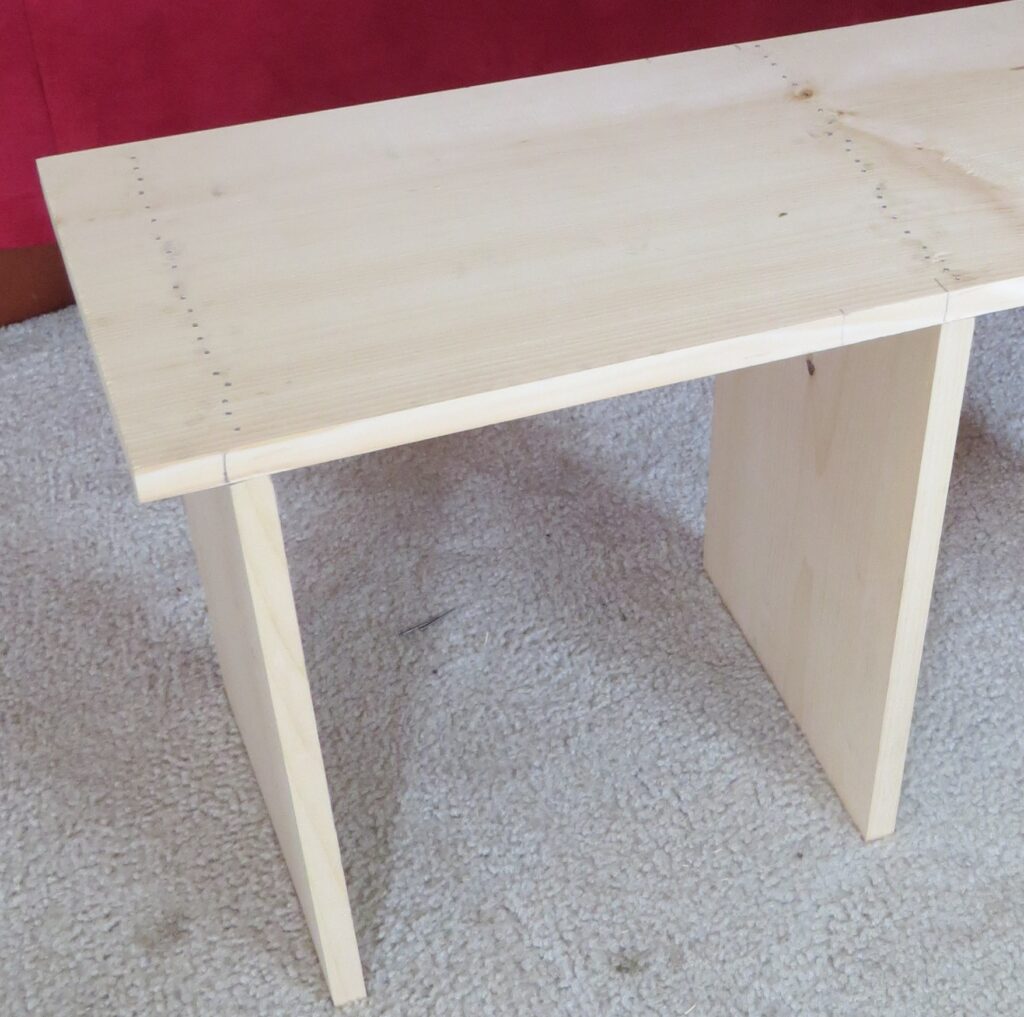
At this point, you’ve connected 1 long piece of wood to the 2 bottom shelves.
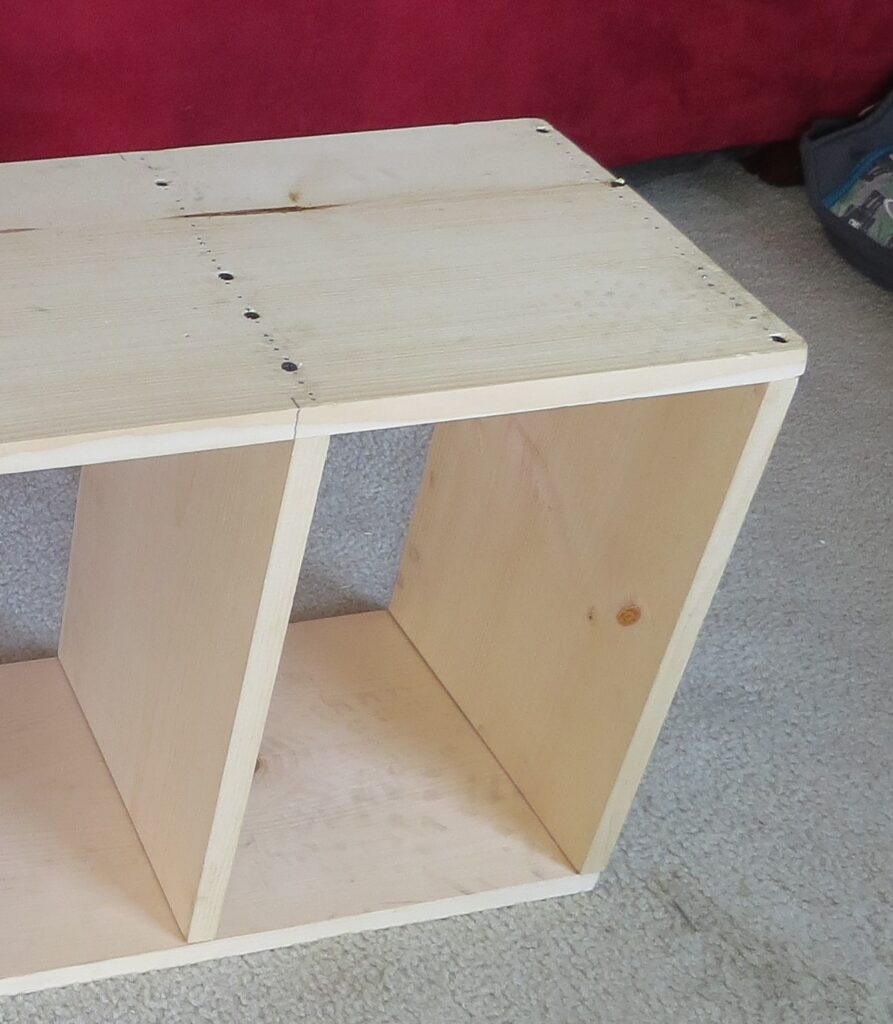
Now, turn it over and line up the 2nd long piece of wood. Hammer in a row of nails over the bottom shelf (left side in photo). Then, hammer in a row of nails over the 2nd shelf (right side of photo). If you plan to use screws, leave some space to add screws later.
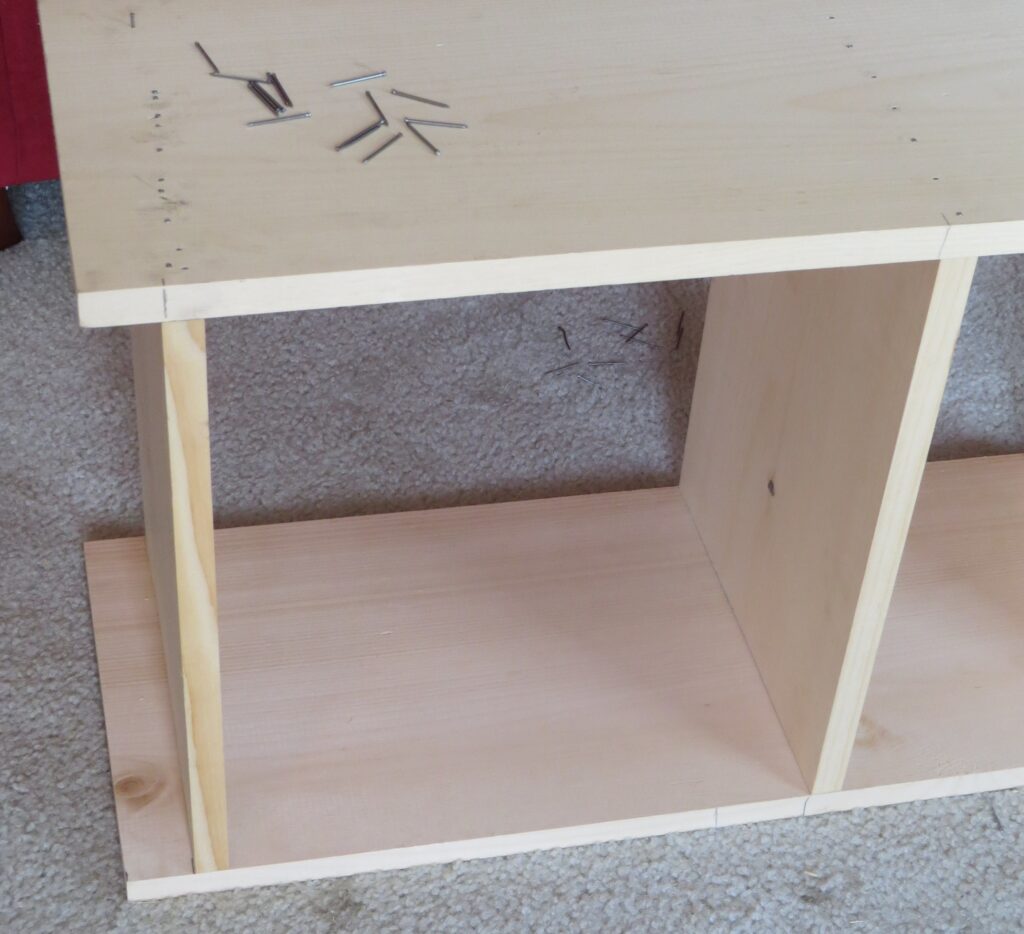
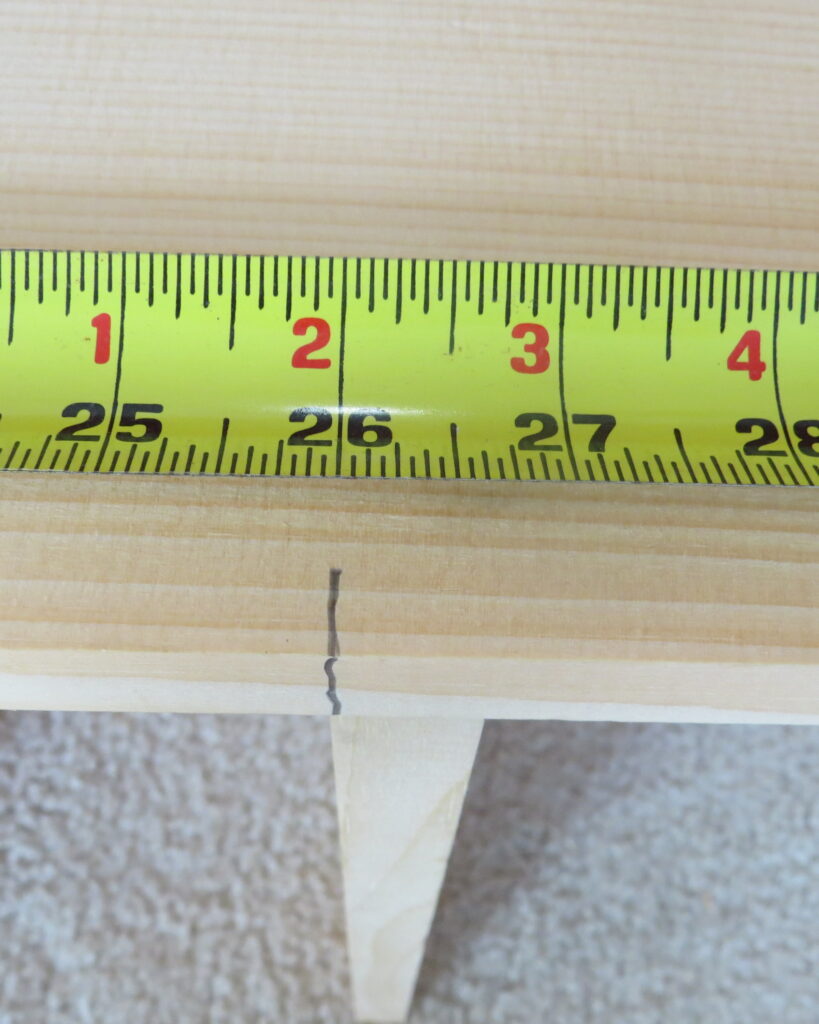
4. Fourth, measure 26 inches this time from the bottom of the shelf. Mark 26 inches with a pencil on BOTH sides. Line up the 3rd shelf and hammer in a row of nails. If you plan to use screws, leave some space to add screws later.
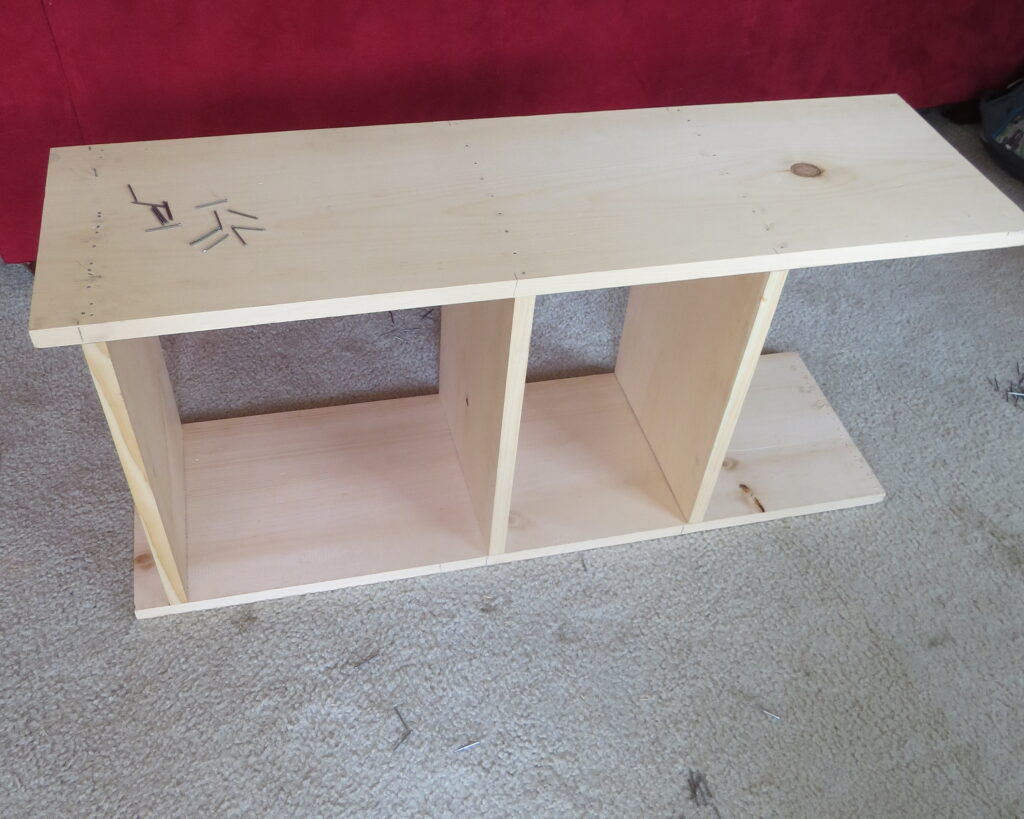
5. Fifth, line up the top shelf and hammer in a row of nails. If you plan to use screws, leave some space to add screws later. Then, turn the shelf over and hammer in 2 more rows of nails, one on the third shelf and one on the top shelf.
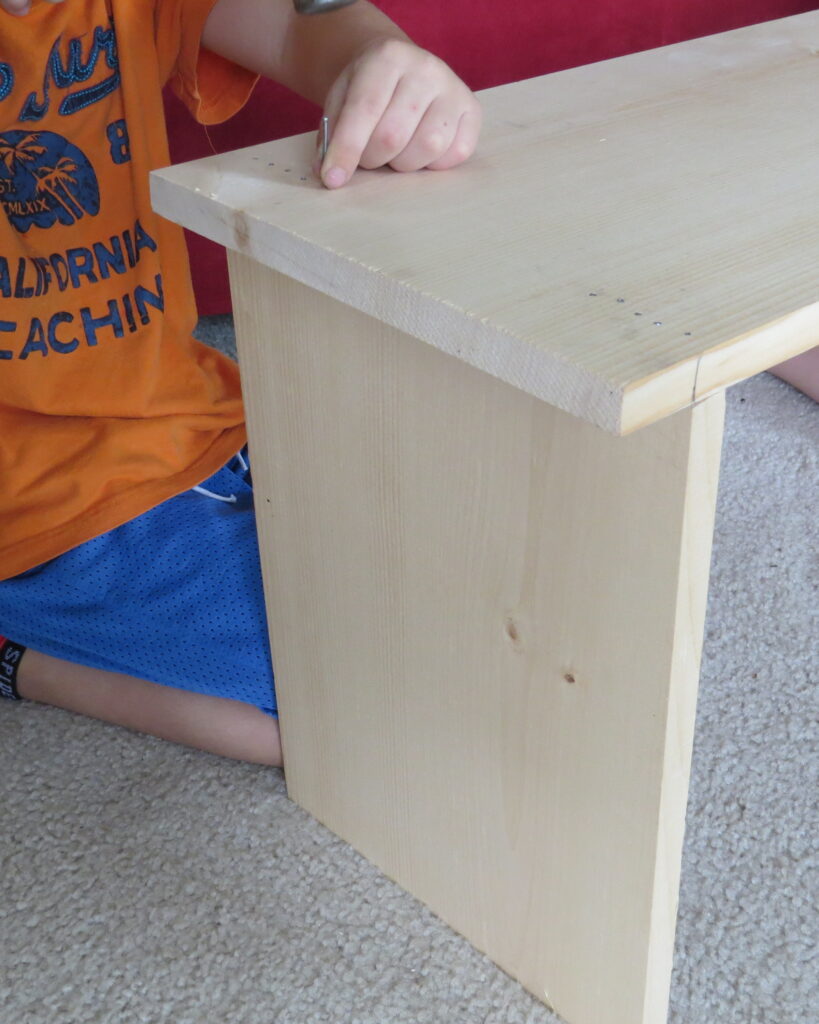
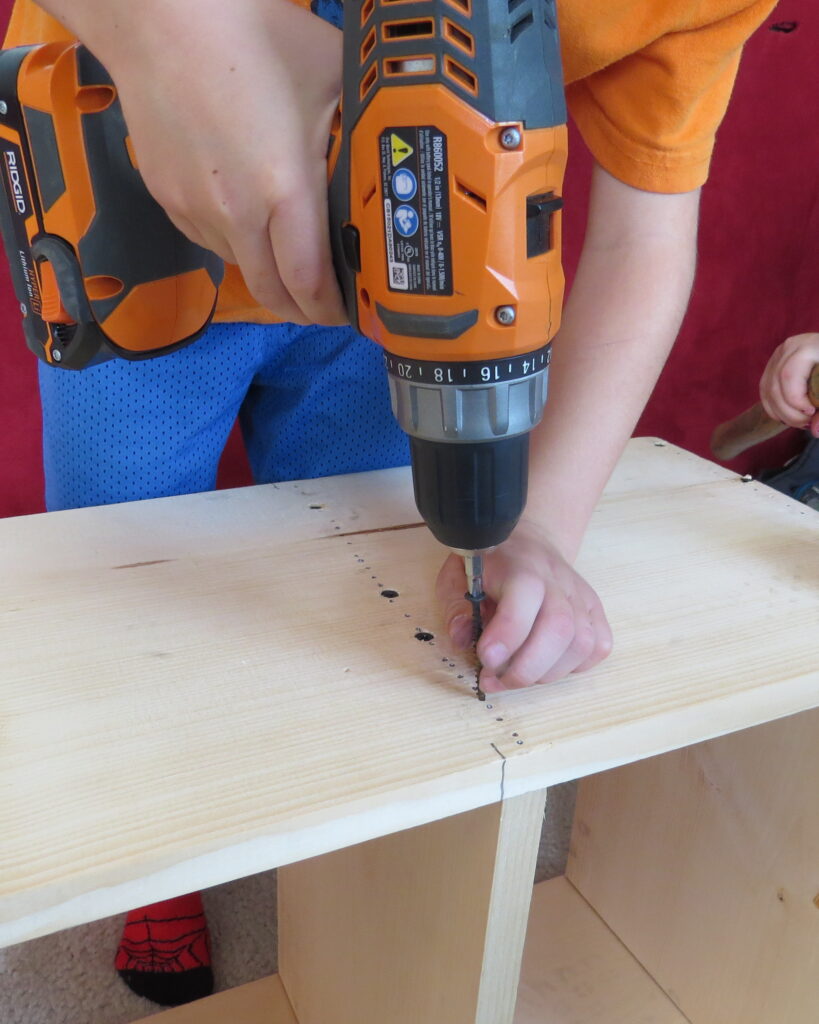
6. Sixth, reinforce each shelf with more nails or screws. At this point, you’ve hammered in 8 rows of nails, two rows for each tier (4 rows on each side of the shelf). If you want to use screws, now is the time. Guide your child in finding gaps between the nails. Have them drill in 3-4 screws for each row.
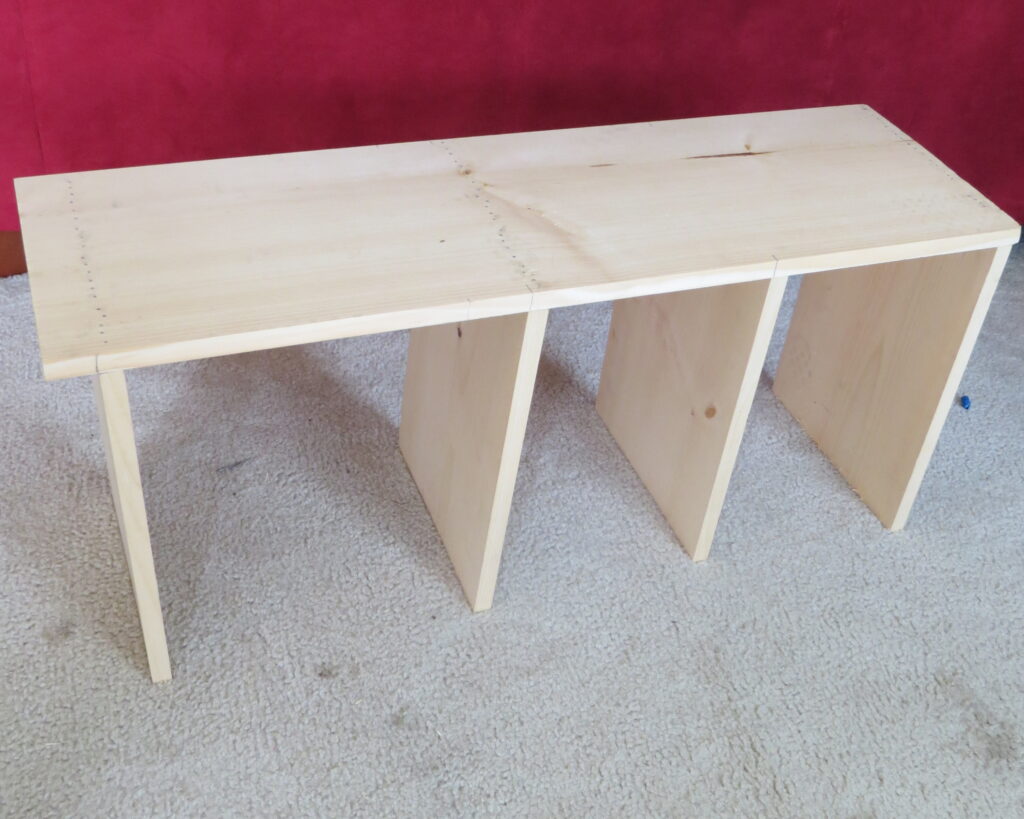
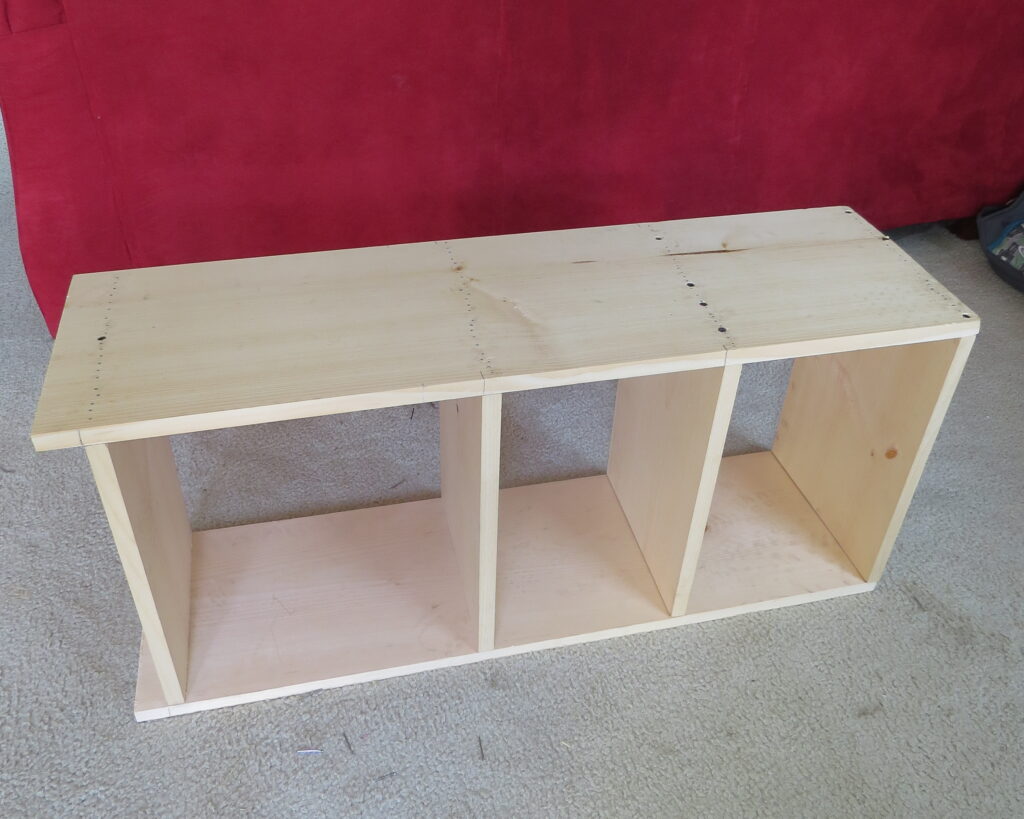
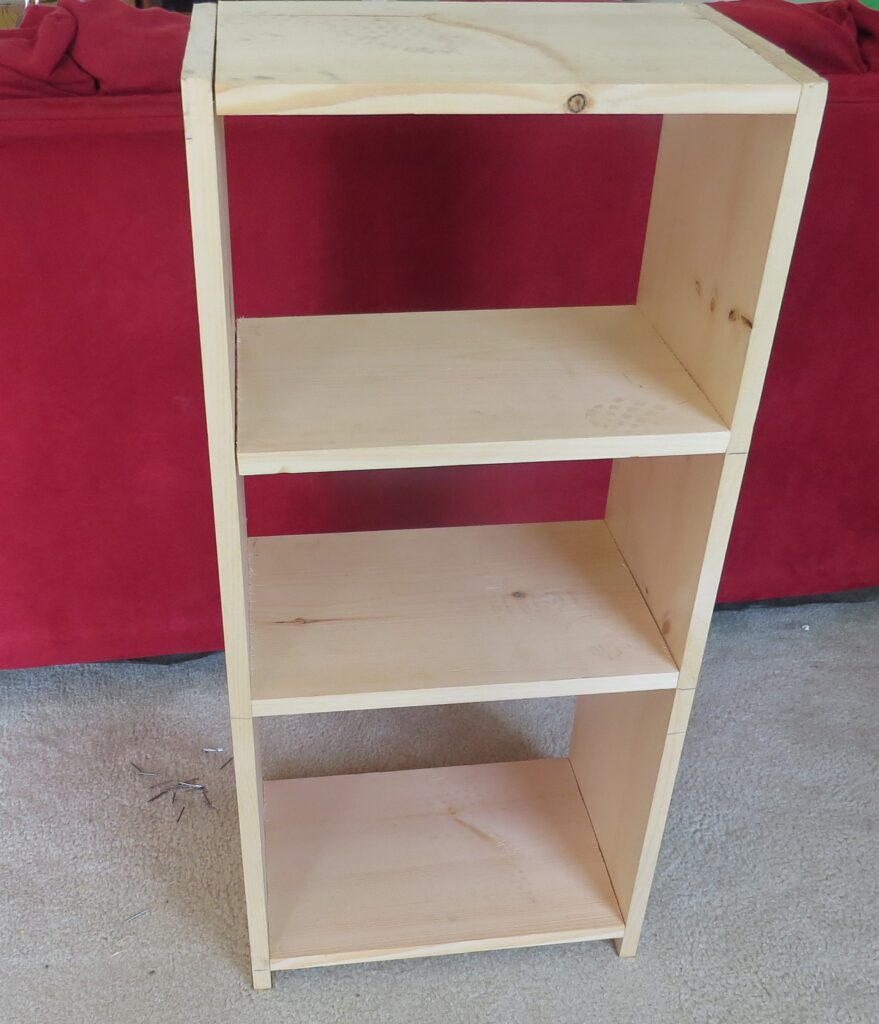
Done!
That completes the super simple multi-purpose shelf!
A sigh and smile of satisfaction and relief:
P.S. If you have the time, energy and resources on another day, by all means let your kids paint it.
Print the Building Instructions
Now for the Writing Lesson!
To get a full understanding on how I conduct each writing lesson you may want to read the Writing Prompts Introduction post. The opinion lesson outlined below (and all other prompts posted) will make more sense and be easier to follow and use. Here’s the lined paper I use for Grades K-2 and Grades 2-7
Common Core State Standards
NOTE: This lesson can address the following Common Core State Standards: CCSS.ELA.LITERACY.W.K.1, W.1.1, W.2.1, W.3.1, W.3.1.A, W.3.1.B, W.3.1.C, W.3.1.D, W.4.1, W.4.1.A, W.4.1.B, W.4.1.C, W.4.1.D, W.5.1, W.5.1.A, W.5.1.B, W.5.1.C and W.5.1.D.
Tell the Story Line:
Begin the lesson by telling the story line: “You just built a multi-purpose shelf. Now you’re going to write your opinion about the process.”
Brainstorm
Give the kids time to think about whether or not they liked building the shelf. Then, have them think of reasons why they did or did not.
For example, children might like the project for these reasons:
- Few materials, little time, easy, useful product
- Motivation to build more for myself or for family and friends
- Possibly sell shelves in the future
Or, children might not like the project for these reasons:
- Too loud, too hard, too long, useless
- I hit my thumb with the hammer and got hurt
- It made me sweaty
- It’s not very fancy like the shelves you buy in the store
Show the 5 Sections
- Introduction/General Opinion
- Materials
- Building
- Using the Shelf
- Conclusion/Thoughts for the Future
As mentioned in my writing prompts introduction: K-1st Graders are encouraged to write 1 sentence for each section, 2nd Graders 2 sentences, 3rd Graders 3 sentences and so on.
Now to Write!
- First, begin by writing your general opinion about building the multi-purpose shelf. Feel free to engage the reader by asking questions or exclamations.
For example, a kindergartner or 1st Grader might write:
Do you like the build? I hate it! OR Do you like to build? I love it!
Or, a 5th Grader might write::
Do you like to build? Is your house cluttered with books or shoes? You might like to try building a 4 tier shelf. It’s so easy. I loved building it and am so proud of myself!
2. Next, write your thoughts about the materials and tools. Were they simple, easy, inexpensive or difficult, heavy, expensive etc.
3. Third, write your thoughts about the building part.
4. Next, write your thoughts about using the shelf in the future.
5. Lastly, write the conclusion. Restate your opinion. Write any thoughts you have about other building projects in the future. You can also encourage the reader to try building the shelf or discourage the reader from doing so.